

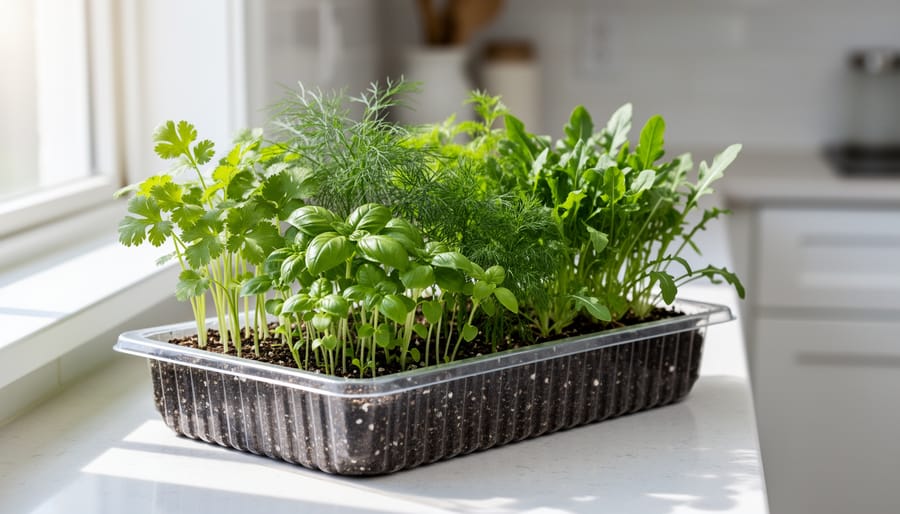
Growing micro herbs at home takes just 7 to 14 days from seed to harvest, requires nothing more than a sunny windowsill or basic grow light, and delivers fresh greens year-round without outdoor garden space. You’ll sow dense clusters of herb seeds in shallow trays filled with potting mix, keep them consistently moist, and snip the tender seedlings once they reach 2 to 3 inches tall. This fast-harvest method works perfectly in northern climates where winter limits outdoor growing, and the entire setup costs less than $30 to start.
Unlike full-grown herbs that take weeks or months to mature, micro versions pack concentrated flavor into tiny leaves. Basil, cilantro, dill, and arugula all thrive as micro herbs, offering the same taste profiles you’d expect from their mature counterparts but in miniature form. The quick turnaround means you can harvest a fresh crop every two weeks, rotating varieties to match whatever you’re cooking.
The process suits renters and homeowners equally well because it demands no permanent installations or outdoor access. A standard 10×20-inch seedling tray fits on most kitchen counters, and the shallow root systems mean you won’t need deep containers or large bags of soil. For northern growers dealing with short growing seasons and limited sunlight, micro herbs solve the perennial problem of accessing fresh produce when outdoor gardens lie dormant under snow.
What You’ll Need to Get Started
Growing micro herbs requires surprisingly few supplies, making this an ideal project for anyone interested in DIY tips for beginners. You can start with basic household items and upgrade later as you expand your indoor garden.
Essential Supplies:
- Seeds: Purchase untreated, food-grade seeds specifically labeled for sprouting or microgreens (radish, arugula, basil, cilantro, sunflower, pea shoots)
- Growing containers: Shallow trays 1-2 inches deep with drainage holes, or repurpose takeout containers, aluminum baking pans, or plant saucers
- Growing medium: Organic potting soil, seed-starting mix, or coconut coir for soil-based growing; hydroponic grow mats or burlap for soil-free methods
- Spray bottle or watering can with fine rose: For gentle watering that won’t displace seeds
- Light source: South-facing windowsill or full-spectrum LED grow lights (essential for Canadian winters when natural light drops below 12 hours daily)
Optional But Helpful:
- Humidity dome or clear plastic wrap: Maintains moisture during germination, especially useful in dry winter homes with forced-air heating
- Heat mat: Speeds germination in cool basements or drafty spaces, keeping soil at optimal 65-70°F
- Small scissors or harvest knife: Clean cuts prevent crushing delicate stems
- Plant labels: Track varieties and planting dates when growing multiple trays
Where to find supplies in Canada: hardware stores like Home Depot and Canadian Tire carry basic growing supplies, while West Coast Seeds, Veseys, and William Dam Seeds offer quality microgreen seed packets online. Dollarama sells budget-friendly spray bottles and shallow containers. For grow lights, has affordable options starting around $25, or check local hydroponics shops for higher-end setups. Expect to spend $30-50 for a complete starter kit, less if you repurpose containers and use windowsill light.
Choosing the Right Micro Herbs for Your Space
Fast-Growing Varieties (7-10 Days)
Radish micro greens shoot up faster than almost anything you can grow indoors. From seed to harvest in just 7 days, they deliver a crisp, peppery punch that works in salads, sandwiches, and garnishes. Arugula follows close behind at 8-9 days with its signature nutty bite, while mustard greens hit the 9-10 day mark with serious spice levels that mellow slightly when harvested young.
These speed champions are perfect for first-timers because they germinate reliably even in less-than-ideal conditions. They tolerate the dry winter air common in northern homes better than slower varieties, and they don’t demand perfect lighting. If you’re testing whether micro herb growing works for you, start here, you’ll be eating your first harvest before you’ve finished reading about slower options.
Flavorful Favorites (10-14 Days)
Basil micro greens deliver intense, sweet flavor that surpasses mature leaves in concentration, perfect for finishing pasta dishes or garnishing tomato salads. Cilantro shoots offer that distinctive citrus-pepper taste within 12 days, ideal for topping tacos or stirring into Asian-inspired soups. Dill microgreens bring delicate anise notes that complement seafood and cream-based dishes, while maintaining a tender texture mature dill rarely achieves. Parsley micros, though taking the full 14 days, provide clean, bright flavor without the bitterness older parsley can develop.
These varieties need slightly more light than fast-growers, position them in your sunniest window or under grow lights for 14-16 hours daily. In northern winter homes, supplemental lighting becomes essential rather than optional for achieving that robust flavor concentration chefs prize.
Safety and Setup Considerations
Before you scatter your first seeds, take a few minutes to set up safely. Growing micro herbs indoors is low-risk, but a bit of prevention keeps your harvest healthy and your household safe.
Start with food-safe containers. Avoid anything that held chemicals, paint, or non-food products, residues can leach into your growing medium. Clean plastic produce containers, ceramic dishes, or stainless steel trays work well. If you’re repurposing yogurt tubs or takeout containers, wash them thoroughly with hot soapy water first.
Buy untreated, food-grade seeds specifically labeled for sprouting or microgreens. Garden seeds often come coated with fungicides or pesticides meant for outdoor use, not for greens you’ll eat in a week. Check seed packet labels and purchase from reputable suppliers.
Mold loves stagnant, humid air. If you’re using a humidity dome or plastic cover during germination, crack it open daily to exchange air. Once seeds sprout, remove covers entirely and ensure your growing area has gentle air circulation. A small fan on low speed several feet away helps, but don’t blast seedlings directly. Northern homes with forced-air heating tend to be dry in winter, which actually reduces mold risk but may require more frequent misting.
Keep grow lights away from water sources and use proper fixtures rated for indoor use. Don’t drape cords across doorways or under rugs. If you’re positioning trays near heating vents for warmth, monitor them closely, direct heat dries out soil fast and can scorch tender seedlings. A spot with ambient warmth beats a blast of hot air.
Step-by-Step: Growing Micro Herbs from Seed to Harvest
Preparing Your Growing Container
Clean your container thoroughly with hot, soapy water before first use, even if it’s new. Residue from manufacturing or previous plantings can harbor bacteria that competes with seedlings. Rinse completely and let it air dry.
Check for drainage holes in the bottom. Standard nursery trays usually have them, but repurposed containers might not. For micro herbs, drainage isn’t strictly necessary since you’ll mist lightly rather than soak the soil, but a few small holes prevent water pooling if you accidentally overwater. Poke them with a heated nail or drill bit if needed.
Choose your growing medium. Potting soil works well, use a light, sterile seed-starting mix rather than heavy garden soil, which compacts and drains poorly. Fill containers to a depth of one to two inches; micro herbs have shallow roots and don’t need more. Press the soil gently to level it, leaving the surface smooth but not packed hard.
For hydroponic growing, use coconut coir mats or hemp pads cut to fit your tray. Soak them completely in water, let excess drain, then lay flat. These hold moisture evenly and eliminate soil mess, though they dry faster than soil in heated winter rooms.
Sowing Seeds for Maximum Density
Micro herbs thrive when seeds are planted densely, much closer than traditional spacing, but not so thick they suffocate each other. Aim for seeds nearly touching but still visible as individual seeds, roughly 8-10 seeds per square inch depending on variety size.
Some seeds benefit from a 4-8 hour pre-soak in room temperature water. Larger seeds like sunflower and pea shoots soften faster and germinate more evenly after soaking. Smaller seeds like basil and arugula can be sown dry without losing time.
Sprinkle seeds evenly across the soil surface using a gentle back-and-forth motion from your palm. Avoid dumping them in clumps, which creates uneven growth and increases mold risk. For better control, some growers use a small spoon or fold paper to create a seed-dispensing funnel.
Lightly press seeds into the soil with your palm or a flat object, they need contact with moisture but shouldn’t be buried deep. Then sprinkle just enough soil to barely cover them, about 1/8 inch maximum. Many micro herb seeds need some light to germinate, so a thin layer works best.
Water using a fine mist spray bottle rather than pouring. Direct water streams displace seeds into clumps and create bare patches. Mist until the surface glistens but water doesn’t pool.
Creating the Right Growing Environment
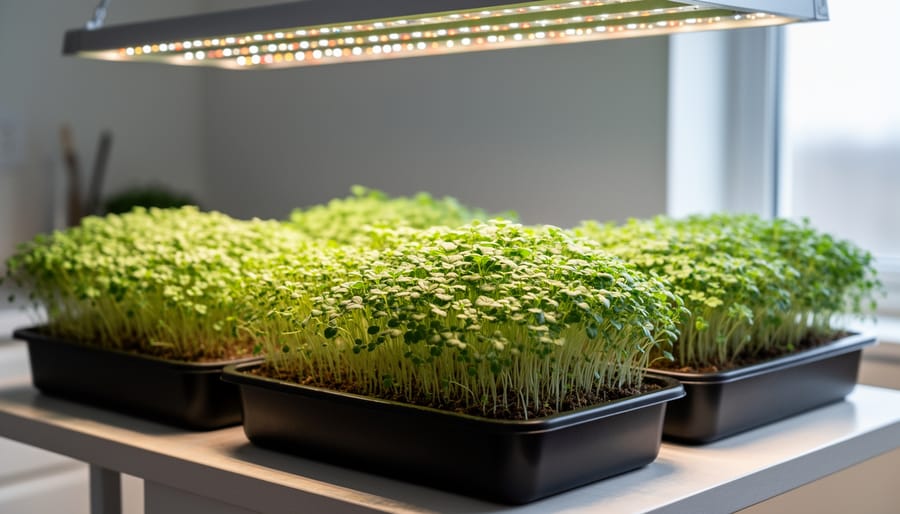
Micro herbs need 12 to 16 hours of light daily to grow strong and compact. A south-facing window works during summer, but northern winters rarely provide enough natural light. Invest in an inexpensive LED grow light positioned 4 to 6 inches above your trays, this setup costs $20 to $40 and makes year-round growing possible regardless of Canada’s short winter days.
Keep your growing area between 60°F and 70°F. Most homes naturally fall into this range, but avoid placing trays directly above heating vents or radiators, which create hot spots that dry out soil and stress seedlings. Conversely, don’t set containers against cold exterior walls or drafty windowsills in winter, where temperature swings slow germination.
Humidity matters most during the first three to five days. Cover your seeded trays with a clear plastic dome or simply drape plastic wrap over the top to trap moisture and warmth. Once seeds sprout, remove the cover gradually, crack it open for a few hours first, then take it off completely. Northern homes run dry in winter due to forced-air heating, so consider a small humidifier nearby or mist trays lightly if leaf tips brown.
Daily Care and Watering
Once your seeds germinate (typically 2-4 days), remove any humidity dome or plastic cover to allow air circulation and prevent mold. Check moisture levels twice daily by touching the soil surface, it should feel damp but never soggy or waterlogged.
Mist lightly with a spray bottle once or twice per day, adjusting frequency based on your home’s humidity. Northern homes with forced-air heating can dry out trays quickly, especially in winter. If you notice soil pulling away from container edges or micro herbs wilting between waterings, increase misting frequency or place a shallow water tray nearby to add ambient moisture.
Rotate your trays 180 degrees daily so all sides receive equal light exposure. This prevents uneven, leggy growth where seedlings stretch toward the light source.
Bottom watering works well after the first week: set containers in a shallow tray of water for 10-15 minutes, then drain completely. This encourages stronger root development without disturbing delicate stems. Never let containers sit in standing water, which invites root rot and fungal problems.
Harvesting at Peak Freshness
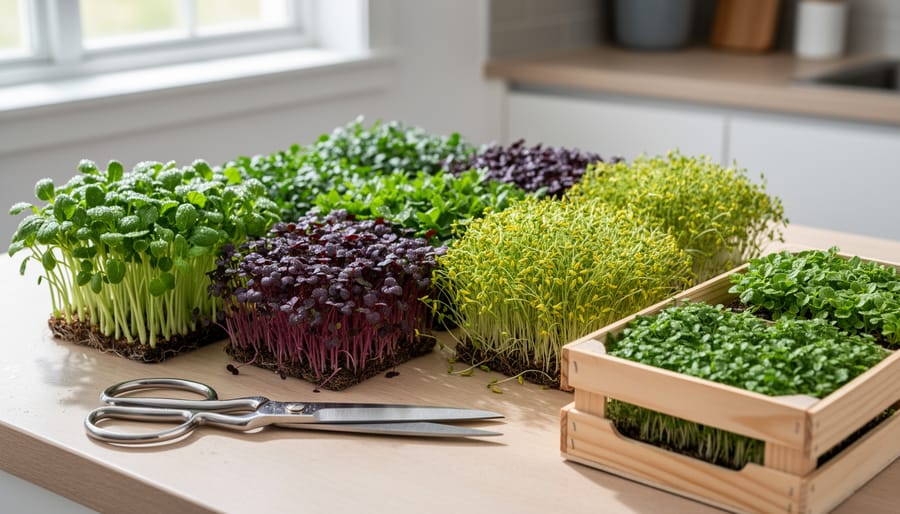
Your micro herbs are ready to harvest when they’ve developed their first set of true leaves, the second set that appears after the initial seed leaves. This typically happens 7-14 days after sowing, depending on the variety. The plants should stand 2-3 inches tall with vibrant color and sturdy stems.
Use clean, sharp scissors to cut the stems about half an inch above the soil line. Harvest in the morning after the dew point but before the day’s heat for maximum flavor retention. You can take the entire tray at once or selectively harvest larger plants first, though most micro herbs won’t regrow after cutting.
Exceptions exist: pea shoots often produce a second, smaller flush if you cut above the lowest leaf node. Sunflower micros sometimes send up side shoots. However, most varieties like basil, cilantro, and radish are one-and-done harvests.
Cut only what you’ll use immediately or within 2-3 days. Micro herbs lose flavor and wilt quickly once cut, so successive small harvests beat cutting everything at once unless you’re storing them properly or using the full batch for a recipe.
How to Know Your Micro Herbs Are Ready
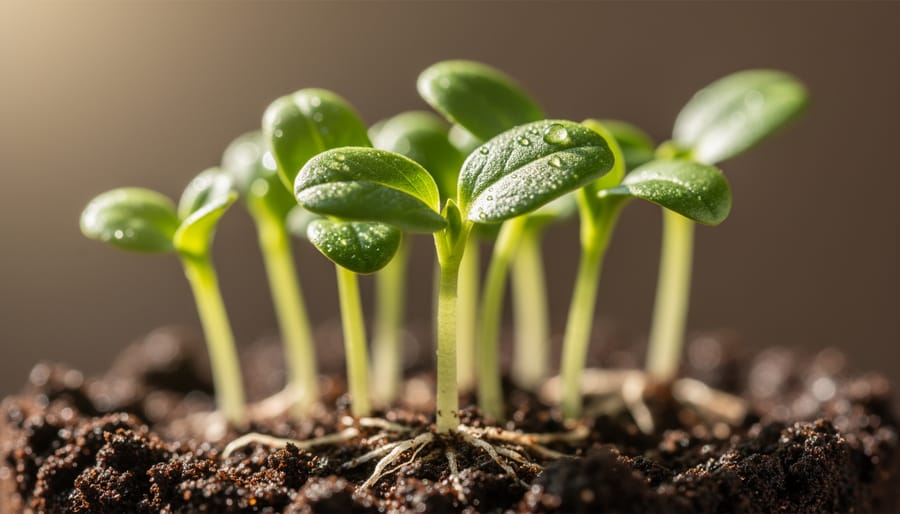
Micro herbs are ready to harvest when they develop their first set of true leaves, which appear after the initial seed leaves (cotyledons). This typically happens at 7-14 days depending on the variety, but visual cues matter more than counting days on your calendar.
Your micro herbs have reached peak harvest when you spot these signs:
- Height of 2-3 inches for most varieties (pea shoots can reach 4-5 inches)
- True leaves have emerged and fully opened above the rounded seed leaves
- Vibrant, consistent color throughout the crop (deep green for basil, bright purple-red for radish)
- Stems feel firm and upright when you gently brush your hand across the tray
- Fresh, concentrated aroma when you get close to the tray
Under-ready micro herbs look spindly with only the initial rounded cotyledons visible, while over-mature plants develop woody stems, larger leaves that lose their tender texture, and sometimes a bitter edge to their flavor. Radish and mustard micro greens turn noticeably spicier after peak, while basil can become tough and lose its sweet fragrance.
Test a small cutting before harvesting your entire tray. Snip a few stems, rinse them, and taste. You want tender texture and concentrated flavor without any fibrous chewiness. If they taste mild or the stems are hard to bite through, give them another day or two. Once you hit that sweet spot of intense flavor and crisp tenderness, harvest the whole tray within 24 hours for best results.
Troubleshooting Common Growing Problems
Leggy, stretched seedlings signal insufficient light. Move your trays closer to a window or reduce the distance between grow lights and the container to 4-6 inches. In Canadian winters, natural light often isn’t strong enough, supplemental LED grow lights solve this problem and consume minimal electricity.
Mold appears as white, fuzzy growth on soil or seeds, usually from overwatering combined with poor air circulation. Remove the humidity dome once germination starts, reduce misting frequency, and point a small fan across the room (not directly at seedlings) to keep air moving. If mold has taken hold, carefully remove affected areas with a spoon and let the surface dry slightly before resuming lighter watering.
Seeds that take longer than expected to sprout often face temperature issues. Most micro herbs germinate best between 65-75°F, which can be challenging in drafty northern homes. Move trays away from cold windows and exterior walls. Check seed packet dates, old seeds lose viability, especially if stored in humid conditions.
Yellowing leaves typically mean the growing medium lacks nutrients or you’ve been harvesting from the same tray too long. Micro herbs grown in soil usually have enough nutrients for one harvest cycle. For hydroponic setups, a very diluted liquid fertilizer (quarter strength) applied after true leaves emerge can help, though most growers simply start fresh trays.
Why are my micro herbs wilting even though the soil is wet?
Overwatering drowns roots and prevents oxygen absorption. Let the surface dry slightly between mistings and ensure your container has drainage holes.
Can I save a tray that developed mold?
If mold covers less than 20% of the surface, remove affected areas, improve airflow, and reduce watering. Extensive mold means starting fresh is safer.
What causes brown, crispy leaf tips?
Dry indoor air from forced-air heating systems pulls moisture from delicate leaves. Mist more frequently or use a small humidifier nearby during winter months.
Indoor pests are rare but watch for fungus gnats if you’re overwatering. Let soil dry between waterings and consider a thin layer of sand on the surface to disrupt their breeding cycle. Your micro herbs make beautiful, functional additions to holiday table ideas and festive kitchen inspiration fitting perfectly with current decor trends that emphasize living greenery.
What to Do Next: Storage and Succession Planting
Once you’ve cut your first batch of micro herbs, store them properly to maximize their week-long shelf life. Gently rinse the greens, pat them nearly dry with a clean towel, then wrap them loosely in a damp paper towel. Place the bundle in a plastic bag or airtight container and refrigerate immediately. Check the paper towel every couple of days and re-dampen it if it dries out. Properly stored micro herbs stay crisp and flavorful for five to seven days, far longer than most people expect.
To enjoy a continuous supply without gaps, start a new tray every three to five days. This staggered planting approach means you’ll harvest fresh greens twice a week once your system is running. Keep a simple calendar or set phone reminders for seeding days so you never run out. Many growers dedicate one shelf or windowsill to three or four trays in different stages, creating a reliable indoor production line that fits any kitchen counter.
As you gain confidence, scale up by adding more trays or trying slower-growing varieties like basil alongside your quick radish and arugula staples. Micro herbs make an excellent gateway into broader home herb gardening. Consider transplanting a few seedlings into larger pots to grow full-size herbs, or start perennials like chives and oregano in parallel.
Use your harvest generously to stay motivated. Pile micro greens on scrambled eggs, blend them into smoothies, top homemade pizzas, or garnish soups. The more you cook with them, the more you’ll want to keep trays growing year-round.
Growing micro herbs at home transforms your kitchen into a year-round garden, no matter how cold it gets outside. You’ve seen how a simple tray, some seeds, and basic care deliver fresh greens in under two weeks, a genuine solution for northern gardeners who refuse to let winter dictate their access to homegrown flavor.
Start with one variety this week. Radish micro greens or sunflower shoots are forgiving, fast, and immediately useful in your cooking. Once you’ve harvested that first tray, you’ll understand why so many home growers keep succession plantings going all winter. Each snip of fresh micro herbs connects you to the satisfaction of growing your own food, even when snow covers the ground outside. Your indoor herb garden starts here.
