

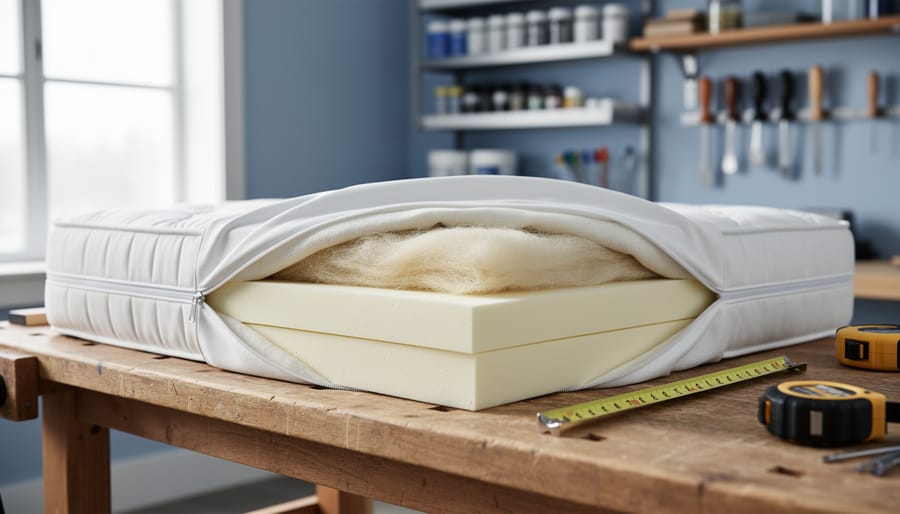
You can build a comfortable, supportive mattress from scratch in a single weekend using readily available materials and basic tools. The process involves layering foam, natural fibers, or a combination of both inside a sewn or zippered cover, giving you complete control over firmness, materials, and size while typically saving 40-60% compared to retail mattresses. For northern homeowners, this DIY approach offers the added advantage of customizing your mattress for temperature regulation, a consideration just as important as your winter home updates.
Building your own mattress isn’t just about cost savings. It addresses a real problem: most commercial mattresses contain materials you can’t verify, offer limited firmness options, and come in standard sizes that might not fit unique bed frames or small spaces common in older northern homes. When you construct your own, you choose every layer, whether that’s natural latex for breathability, high-density foam for support, or wool batting for moisture management during humid summers and dry winters.
The entire project requires no specialized skills. If you can measure accurately, use a utility knife, and operate a basic sewing machine (or hand-sew with patience), you can complete this build. The main investment is time for research and assembly, not expensive equipment. This guide walks you through materials selection for cold-climate durability, safety considerations for adhesives and flame resistance, and the exact construction sequence that results in a mattress comparable to quality retail options.
Why Build Your Own Mattress?
Building your own mattress delivers three powerful advantages that make the project worth the effort: substantial savings, complete customization, and control over what touches your skin for eight hours every night.
The financial case is compelling. A quality queen-size mattress typically costs $1,200 to $2,500 at retail stores, but you can build a comparable DIY version for $400 to $800, depending on your material choices. That represents savings of 40% to 60%, money you can redirect toward other home improvements or simply keep in your pocket. Even premium materials like natural latex or organic cotton batting cost less when purchased directly from foam suppliers than through a mattress retailer’s markup.
Beyond cost, you gain precise control over firmness and feel. Prefer a softer surface for side sleeping but need firm lumbar support? Layer your foams accordingly. Store-bought mattresses force you to accept the manufacturer’s firmness rating, which often falls somewhere between what you actually want and what works for your sleep position. With a DIY approach, you choose the exact foam densities, layer thicknesses, and arrangement that suit your body.
Material control matters especially if you have allergies, chemical sensitivities, or simply prefer natural fibers. You can select CertiPUR-US certified foams that eliminate harmful chemicals, opt for natural latex instead of synthetic memory foam, or build an entirely organic mattress with wool and cotton batting. Many commercial mattresses contain flame retardants, adhesives, and synthetic materials that off-gas for months. Building your own lets you avoid these compounds entirely.
The durability concern is valid but manageable. A well-constructed DIY mattress using quality materials lasts five to ten years, comparable to mid-range store-bought options. The difference is that when a layer wears out, you can replace just that section rather than buying an entirely new mattress. This modular advantage actually extends the useful life beyond many retail mattresses, where a failing comfort layer means replacing the whole unit.
Tools and Materials You’ll Need
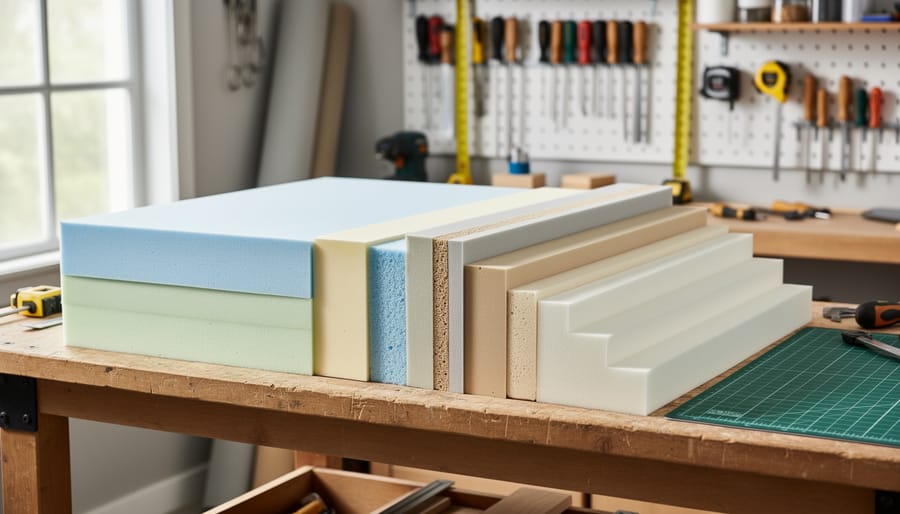
Gathering the right supplies before you start makes the build process smoother and helps avoid frustrating delays mid-project. You’ll need materials for the mattress core, a cover to protect it, and basic tools to cut and assemble everything.
Core Materials and Cover Components:
- Foam layers: Memory foam, polyurethane, or latex in your chosen thicknesses (typically 2-6 inch slabs); budget option is polyurethane foam from foam suppliers
- Alternative natural materials: Wool batting, cotton batting, or latex sheets for eco-friendly builds
- Mattress ticking or cover fabric: 4-6 yards of durable, breathable material like cotton canvas, ticking stripe fabric, or upholstery-grade cloth
- Heavy-duty zipper: Long enough to span at least three sides of your mattress (typically 100-120 inches for Queen size)
- Spray adhesive: Foam-safe adhesive like 3M Super 77 or similar for bonding layers (optional but recommended)
- Thread: Heavy-duty polyester thread if sewing your own cover
Essential Tools:
- Measuring tape: At least 10 feet long for accurate dimensions
- Electric carving knife or long serrated bread knife: For cutting foam cleanly; electric models work better for thick foam
- Permanent marker: To mark cut lines on foam
- Sewing machine or upholstery needle: For constructing the cover; hand-sewing works but takes longer
- Straightedge or yardstick: Helps guide straight cuts
Canadian sources include Foam Factory (online foam supplier shipping nationwide), fabric stores like Fabricland for ticking and canvas, and Home Depot or Canadian Tire for adhesive spray and cutting tools. Many cities have local upholstery supply shops that sell both foam and heavy-duty fabric at competitive prices. Budget-conscious builders can substitute a purchased mattress cover with zipper instead of sewing one, cutting both cost and time.
Safety Precautions Before You Start
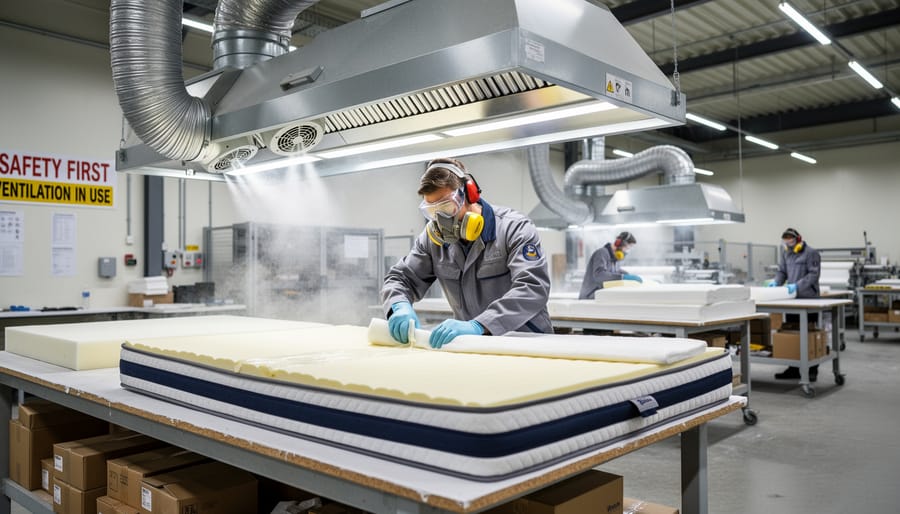
Before you dive into building your mattress, take these safety precautions seriously. Mattress construction involves materials and tools that can pose real risks if handled carelessly, and taking a few minutes now will prevent injuries and health problems down the road.
Start by setting up proper ventilation in your workspace. When you spray adhesives to bond foam layers, they release volatile organic compounds (VOCs) that can cause headaches, dizziness, and respiratory irritation in enclosed spaces. Open windows, use fans to create cross-ventilation, and consider wearing a respirator mask rated for organic vapors. Work outdoors if weather permits, or at minimum use a garage with the door open rather than a closed bedroom.
Sharp tools demand careful handling. Electric carving knives and serrated blades cut through foam easily, which means they’ll slice through skin just as fast. Keep blades pointed away from your body, cut on a stable work surface, and unplug electric tools when changing positions or taking breaks. Never rush through cuts or try to force a blade through resistant material.
Heavy foam layers, especially high-density base foams, weigh more than you’d expect. A queen-size 6-inch base layer can exceed 40 pounds. Lift with your legs rather than your back, keep the foam close to your body, and recruit a helper for large pieces. Trying to wrestle a king-size foam slab solo is a recipe for a strained back.
Finally, respect electrical safety when using power tools. Keep cords away from cutting edges, ensure outlets aren’t overloaded, and work in dry conditions. Check that your electric knife’s cord isn’t frayed before plugging it in.
Choosing Your Mattress Materials and Design
Understanding Foam Types and Density
Choosing the right foam starts with understanding your options. Memory foam conforms closely to your body, relieving pressure points, but it retains heat, a potential issue during summer months even in northern climates. Polyurethane foam, the most budget-friendly choice, offers decent support but typically has a shorter lifespan of 3-5 years. Latex foam (natural or synthetic) provides responsive support with excellent durability and naturally sleeps cooler, making it ideal for Canadian homes where temperature regulation matters year-round. High-resilience foam sits between memory and latex, offering bounce and support without excessive heat retention.
Density determines how your mattress feels and lasts. For foam, this is measured in pounds per cubic foot (PCF). A 3-5 PCF foam works for toppers but won’t provide adequate base support. Quality base layers need 5-7 PCF density to prevent sagging. Comfort layers typically range from 3-5 PCF for that “just right” feel.
You’ll also encounter ILD (Indentation Load Deflection) ratings, which measure firmness. Lower numbers (10-20 ILD) mean softer foam that sinks easily, while higher numbers (35-50 ILD) indicate firmer support. For northern climates, aim for medium-density foams (25-35 ILD) that won’t become rock-hard in cold bedrooms or overly soft in heated spaces. This balanced approach ensures consistent comfort regardless of seasonal temperature swings.
Designing Your Layer Configuration
A standard three-layer configuration gives you the best balance of support and comfort. Start with your base support layer at the bottom: 5 to 6 inches of high-density polyurethane foam with an ILD rating of 35 or higher. This foundation prevents sagging and provides the structural backbone your spine needs.
Above that, add a 2 to 3-inch transition layer of medium-density foam (ILD 25-30). This middle section cushions your body while preventing you from sinking too deeply into the mattress. Think of it as the bridge between firm support and plush comfort.
Your top comfort layer completes the sandwich. Use 2 to 3 inches of memory foam, latex, or softer polyurethane foam (ILD 12-20). This is what you’ll feel first when you lie down, contouring to your pressure points.
Adjust these proportions based on your sleeping position. Side sleepers need more cushioning at the top to accommodate shoulders and hips, so consider a thicker comfort layer (3 inches) or slightly softer ILD rating. Back sleepers do well with the standard configuration. Stomach sleepers should flip the script: use a firmer top layer (ILD 20-25) and reduce its thickness to 2 inches, which keeps hips from sinking and maintains spine alignment.
Working with a tight budget? A single-layer approach can work. Choose one 8 to 10-inch piece of medium-firm foam (ILD 28-32) that balances support and comfort. You’ll sacrifice some customization, but you’ll still get a functional mattress at half the cost. Add an inexpensive foam topper later if you need to adjust firmness.
Step-by-Step Mattress Construction Process
Step 1: Measure and Cut Your Foam Layers
Start by measuring your bed frame or foundation to confirm the exact dimensions you need. Standard mattress sizes in Canada are Twin (39″ × 75″), Full (54″ × 75″), Queen (60″ × 80″), and King (76″ × 80″), but your frame might vary by an inch or two. Measure twice to avoid costly mistakes.
Lay your foam flat on a clean, hard surface like a garage floor or large table. A carpeted area works in a pinch, but hard surfaces give you better control. Use a long straightedge or yardstick as a guide, and mark your cutting lines with a thick permanent marker. Draw on all four edges of the foam so you can see your lines from any angle as you cut. For thicker foam layers, mark lines on the sides too.
When cutting, an electric carving knife works far better than a regular blade. Plug it in, turn it on, and make one smooth, continuous pass along your marked line. Don’t use a sawing motion or stop mid-cut, which creates uneven edges and divots. Keep the knife perpendicular to the foam surface and let the blade do the work without forcing it. If you need to adjust your angle, lift the knife completely and start the cut again from a stopping point.
For the straightest edges, have a helper hold a metal straightedge along your line as you cut, or clamp a board to the foam as a fence. Cut all layers to identical dimensions so they stack evenly. Slightly wavy edges won’t ruin your mattress, but aim for consistency within a half-inch across the entire perimeter.
Step 2: Bond Your Foam Layers
Bonding your foam layers creates a stable, unified mattress that won’t shift during sleep. However, it’s not always necessary. Skip bonding if you want the flexibility to rearrange or replace individual layers later. For permanent configurations, adhesive prevents layers from sliding and creates a more cohesive feel.
If you choose to bond, work in a well-ventilated space and use foam-specific spray adhesive. Apply a thin, even coat to both surfaces you’re joining. Don’t oversaturate, more isn’t better and can create lumpy spots. Let the adhesive become tacky, typically 30-60 seconds depending on the product instructions. Carefully align the layers before bringing them together; once they touch, repositioning is nearly impossible. Press firmly across the entire surface, working from the center outward to eliminate air pockets.
For a no-adhesive option, place a non-skid rug pad between layers. This grippy material keeps foam in place without permanent bonding and costs about $15-30.
After bonding, let your mattress cure undisturbed for 24 hours. This allows the adhesive to reach full strength and off-gassing to subside before you add the cover.
Step 3: Create or Purchase Your Mattress Cover
You have three options for your mattress cover, each with different time and skill requirements.
The easiest route is buying a pre-made zippered cover online. Look for covers specifically designed for mattress encasement in your exact mattress dimensions. These typically cost $40-80 and arrive ready to use. Choose covers made from cotton, bamboo, or polyester blends that are machine washable and breathable, critical for preventing moisture buildup during humid Canadian summers.
If you’re comfortable with basic sewing, making your own cover gives you complete control over fabric choice and fit. You’ll need about 6-8 yards of ticking or heavy canvas fabric, plus a U-shaped or three-sided zipper (available at fabric stores). Start by measuring your foam stack’s length, width, and total height. Add a 1-inch seam allowance to all sides.
Cut your fabric pieces: one top panel, one bottom panel, and four side panels (boxing strips) matching your mattress depth. Sew the zipper into three sides of the bottom panel, leaving one short end open for stuffing. Pin the boxing strips to the top panel, clipping corners at 45-degree angles to create neat box corners. Sew these seams with a straight stitch, then attach the zippered bottom panel the same way. Finish all raw edges with a zigzag stitch or serger to prevent fraying.
For those without sewing skills, local upholstery shops will custom-make covers for $100-200. Provide your exact measurements and specify washable fabric.
Whatever option you choose, breathable fabric prevents heat retention and allows your mattress to air properly between washings.
Step 4: Assemble and Encase Your Mattress
With your foam layers bonded and your cover ready, you’re at the most satisfying part of the process. Getting those foam layers into the cover requires patience and a bit of strategy, but it’s straightforward if you take it slow.
Clear a clean, flat workspace larger than your mattress size. Lay your cover flat with the zipper fully open. If you have help available, now’s the time to use it. Foam layers are bulky and awkward for one person to maneuver, and having someone to guide the opposite end prevents misalignment and reduces the risk of tearing your fresh cover.
Start by gently folding your bonded foam stack in half lengthwise. Don’t crease it sharply; just create a gradual fold that lets you guide it through the opening. Position the folded foam at one end of the cover opening and begin feeding it in, allowing it to unfold naturally inside the fabric. Work slowly and avoid forcing it.
- Insert the folded foam stack through the zipper opening, guiding it to one end of the cover
- Unfold the foam completely inside the cover, checking that it reaches the far corners
- Smooth the cover over the top surface, working from center outward to eliminate wrinkles and bunching
- Check all four corners to confirm the foam sits flush against the fabric edges
- Verify no foam is caught in the zipper teeth before closing
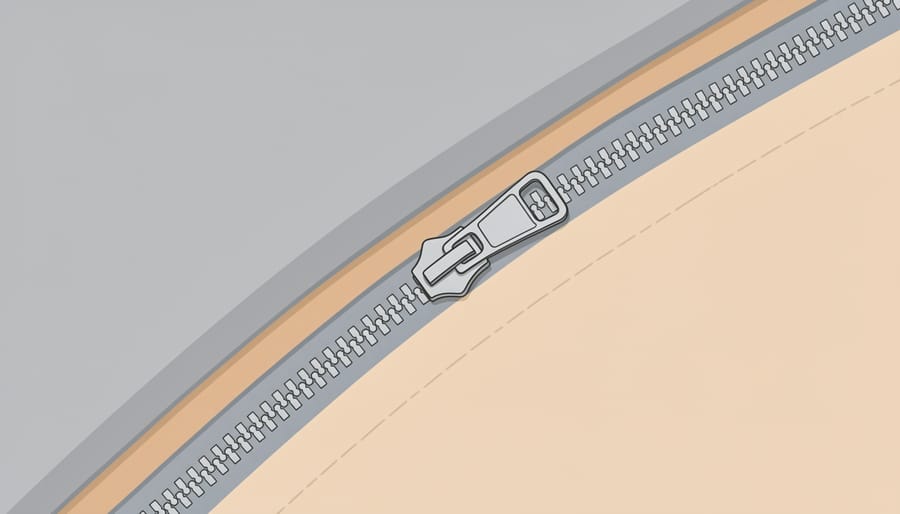
- Close the zipper fully, starting from one end and moving steadily to avoid snagging
Once zippered, walk around your mattress and inspect each side. The cover should fit snugly without excessive looseness or pulling. Give it a gentle press in several spots to confirm the layers feel even and properly distributed.
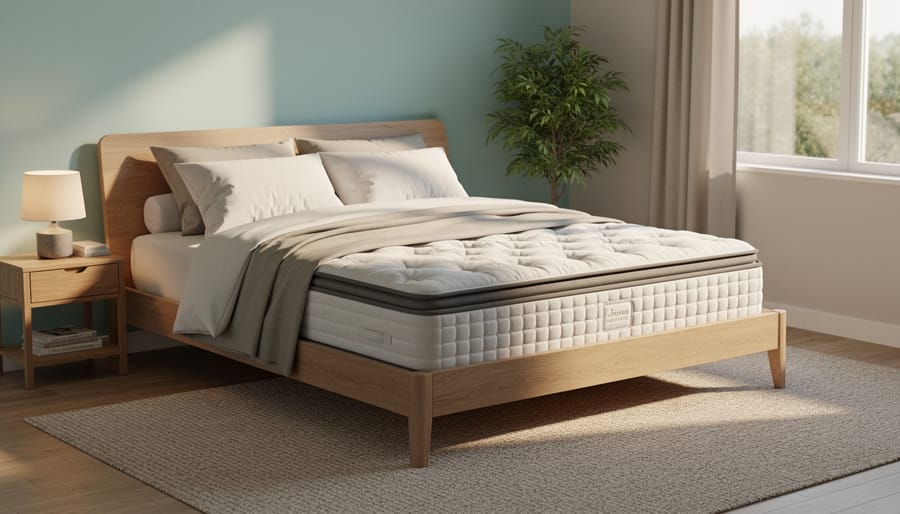
Place your finished mattress in a well-ventilated room and let it rest for 24 to 48 hours before sleeping on it. This off-gassing period allows any residual chemical odors from the foam or adhesive to dissipate. Crack a window if weather permits. After this waiting period, your custom mattress is ready for its first night of use.
Testing and Adjusting Your DIY Mattress
Once your DIY mattress is assembled and has aired out for 24 to 48 hours, it’s time to put it to the real test. Start by lying on the mattress in your typical sleeping positions and paying attention to how your body feels. Your spine should maintain its natural alignment, with no excessive sinking at the hips or shoulders. Press your hand into the gap between your lower back and the mattress when lying on your back. If you can slide your whole forearm through easily, the mattress is likely too firm. If there’s no gap at all, it may be too soft.
Check that the foam layers aren’t sliding against each other when you move around. Roll from side to side and sit on the edge to test stability. The cover should lie flat without bunching at the corners or pulling tight across the surface. If you notice wrinkles or excess fabric, the cover may need adjustment.
During this break-in period, minor discomfort is normal as your muscles adapt. However, persistent pressure points, morning stiffness, or waking up multiple times per night signal a problem worth addressing.
If your mattress feels too firm after the testing period, the quickest fix is adding a two-inch softer foam topper rather than rebuilding entirely. For a mattress that’s too soft and lacking support, you’ll need to replace the base layer with higher-density foam, typically moving from a 1.5-pound density to a 2.0-pound or higher option.
Layers that shift during the night require bonding with spray adhesive or placing a rubber rug pad between them. A cover that’s too tight needs re-sewing with an additional inch of allowance on each side. Most issues are fixable without starting from scratch, which is one of the key advantages of building your own mattress. You control every component and can swap out individual layers as your comfort needs change over time.
Maintenance and Care for Your Homemade Mattress
Your DIY mattress needs regular maintenance to perform well for years. Start by rotating it 180 degrees every three months to ensure even wear across all foam layers. If you designed your mattress with identical top and bottom layers, you can flip it as well, though most DIY designs work best with a single sleep surface.
Invest in a quality mattress protector from day one. It shields your work from spills, body oils, and dust mites while remaining breathable enough to prevent heat retention. Wash your removable cover every three months in cold water on a gentle cycle, and let it air dry to prevent shrinkage.
Vacuum the mattress surface monthly using your upholstery attachment to remove dust, dead skin cells, and allergens that accumulate over time. This simple step keeps your sleep environment healthier and extends foam life.
Northern summers bring humidity that can lead to moisture buildup inside foam layers. Air out your mattress twice yearly by removing the cover and standing the foam layers upright in a well-ventilated room for several hours. Run a fan nearby to speed the process. This prevents mold growth and keeps materials fresh.
With proper care, expect your DIY mattress to last five to ten years. High-density base layers typically outlast softer comfort layers. When your top layer shows permanent body impressions deeper than one inch or loses its bounce, replace just that layer rather than rebuilding from scratch. Replace the entire mattress when the base layer sags noticeably or you wake with new aches.
Frequently Asked Questions
Can I make a mattress without sewing?
Yes, you can skip sewing by purchasing a premade zippered mattress cover from online foam suppliers or upholstery shops. Simply stuff your foam layers into the cover and zip it closed.
Is a DIY mattress as good as store-bought?
With quality materials, a DIY mattress can match or exceed store-bought options in comfort and durability. The key is using certified foams with appropriate densities for your sleep style.
How much does it cost to build your own mattress?
Most DIY mattresses cost between $200 and $600 depending on size and materials. A Queen-size mattress with mid-range foam typically runs $350 to $450, while premium latex pushes costs higher.
Will my DIY mattress be too firm or too soft?
Start with a medium-density configuration and adjust after testing. You can always add a softer topper layer or swap the base foam if needed after your initial two-week trial period.
Can I use recycled or secondhand foam?
You can, but proceed carefully. Inspect for mold, odors, stains, and structural breakdown. Never use foam from unknown sources, and thoroughly clean any recycled materials before use.
Where can I buy foam in Canada?
Online foam suppliers like, The Foam Factory, and local upholstery shops carry mattress-grade foam. Many cities also have specialty foam retailers that cut to custom sizes.
These questions cover the practical concerns most first-time mattress builders face. The answers give you clear direction without overwhelming detail, helping you decide if a DIY mattress project fits your situation and budget. Building your own mattress connects to the same satisfaction you get from other cozy home ideas where you create something personal and functional for your space. The process becomes easier once you understand the basic components and have your materials lined up. If you run into challenges during construction, refer back to the troubleshooting guidance in the testing section or reach out to your foam supplier for technical support on specific products.
Building your own mattress is more achievable than most people realize, and the rewards extend far beyond the money you’ll save. You’ve now got the complete roadmap to create a sleep surface tailored exactly to your preferences, whether that means extra softness for your shoulders or firmer support for your lower back. The key to success is choosing quality materials from the start and resisting the urge to rush through any step.
There’s genuine satisfaction in sleeping on something you built with your own hands, knowing every layer was chosen specifically for you. Unlike store-bought options, your DIY mattress isn’t a compromise. If your firmness needs change in a year or two, you can simply swap out a single layer rather than replacing the entire mattress. As you gain confidence with this project, you might find yourself inspired to upgrade your space with other custom furniture projects.
Have you built your own mattress or are you planning to start? Share your experience, questions, or modifications in the comments to help other DIY mattress builders succeed.
