

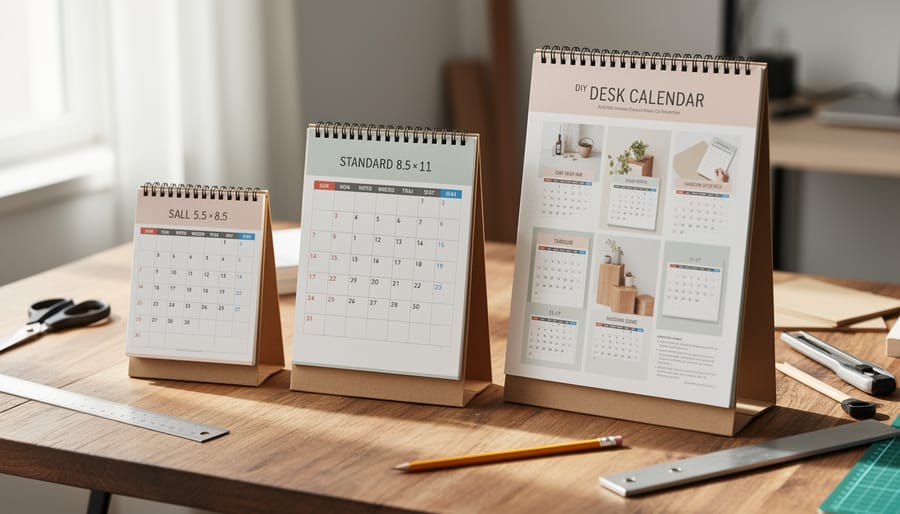
Standard desk calendars for DIY projects typically measure 8.5 x 11 inches (letter size), 11 x 17 inches (tabloid), or the compact 5.5 x 8.5 inches. These dimensions work perfectly with home printers and common binding methods, making them accessible for northern homeowners who want to create custom calendars for tracking seasonal tasks like furnace maintenance schedules, snow removal planning, or holiday planning ideas.
Choosing the right size depends on three practical factors: your available desk space, how much daily detail you need to track, and your DIY equipment capabilities. A compact workspace in a home office calls for different dimensions than a workshop planning station. The beauty of making your own desk calendar lies in customizing both size and function to match your specific needs, whether you’re coordinating winter property maintenance or managing year-round renovation projects. This guide provides exact measurements, material requirements, and complete assembly instructions for creating a functional desk calendar that fits your space and budget perfectly.
Common Desk Calendar Sizes and Their Uses
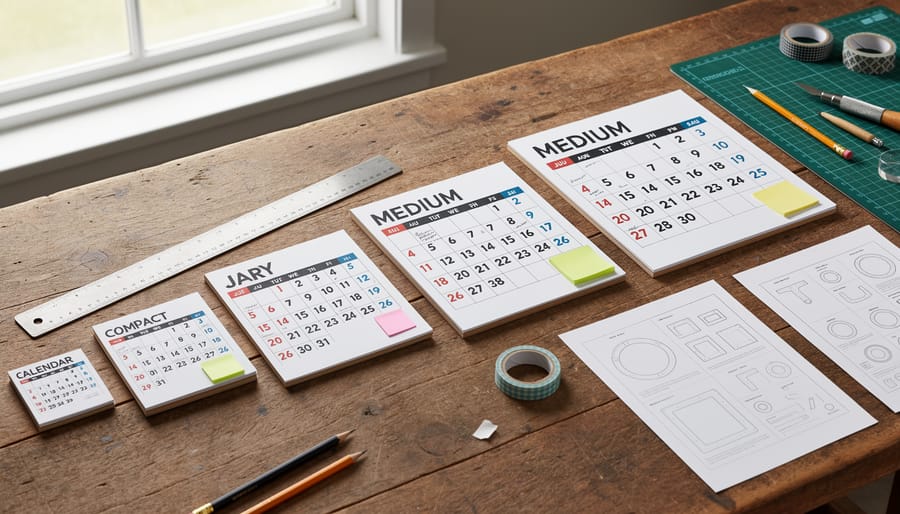
Compact Calendars (5×7 to 6×8 inches)
Compact calendars work beautifully when desk real estate is limited or you prefer a minimalist approach. A 5×7-inch calendar fits easily alongside your keyboard and mouse without crowding your workspace, making it perfect for small home offices or shared work surfaces. The 6×8-inch format offers slightly more writing room while remaining unobtrusive.
These smaller sizes excel at simple monthly views with minimal detail. You can jot down key appointments and deadlines, but there’s limited space for extensive task lists or multiple family schedules. They’re ideal if you primarily need date reference rather than comprehensive planning.
For northern homeowners, compact calendars suit focused seasonal tracking like furnace maintenance dates or snow removal schedules without overwhelming your desk during long indoor months.
Standard Calendars (8.5×11 inches)
The 8.5×11-inch format stands out as the go-to choice for DIY desk calendars, and there’s good reason it dominates home projects. This is standard letter-size paper, which means you likely already have it in your printer tray. No special orders, no trips to specialty shops, no measuring and cutting oversized sheets down to workable dimensions.
This size hits a sweet spot between functionality and practicality. It’s large enough to see clearly from your seated position without squinting at tiny date boxes, yet compact enough that it won’t dominate your desk or force you to relocate your monitor, coffee mug, and family photos. Most desk surfaces, even those cramped corner setups common in northern homes where we squeeze offices into spare rooms, can comfortably accommodate an 8.5×11-inch calendar positioned at an angle or flat.
For DIY creators, the advantages multiply. Your home printer handles this size without hiccups. You’ll find countless free templates already formatted to these exact dimensions. Binding supplies, plastic covers, and easel backs designed for letter-size documents are inexpensive and stocked at any office supply store. If you’re crafting multiple calendars as gifts or tracking different family schedules, you can print a dozen sheets in minutes without reconfiguring anything.
Large Format Calendars (11×17 inches and up)
Large format calendars start at 11×17 inches (tabloid size) and can extend to 22×17 inches or larger. These oversized options shine when you’re managing complex schedules, think multiple family members’ activities, detailed project timelines, or extensive daily task lists that won’t fit in smaller boxes.
The extra real estate proves especially valuable for northern homeowners tracking seasonal responsibilities. You can dedicate space to snow removal schedules, furnace maintenance reminders, garden planning timelines, and holiday prep without cramping your handwriting. Many DIY enthusiasts use large formats to include weather notes, daylight tracking, or visual meal planning alongside standard appointments.
The trade-off? You’ll need substantial desk space, at least 18×12 inches of clear surface for an 11×17 calendar, more for larger sizes. Home printing becomes challenging; most consumer printers max out at 11×17, so you’ll likely need a print shop for initial setup. Assembly requires precise cutting tools and stronger bases to prevent tipping. Budget around $15-25 for materials versus $5-10 for standard sizes.
What You’ll Need to Create Your Custom-Sized Desk Calendar
Gathering the right supplies before you start saves frustration and ensures your DIY desk calendar turns out professional-looking, regardless of which size you choose. The good news for northern homeowners on a budget: most materials are inexpensive and widely available at office supply stores or online.
Your essential toolkit depends partly on your chosen calendar size, but certain items are universal. For any desk calendar project, you’ll need quality paper or cardstock as your foundation. Standard printer paper works for compact calendars, but heavier cardstock (65-110 lb) provides better stability for larger formats. You’ll also need a reliable cutting tool, a paper trimmer for straight edges or a craft knife with metal ruler for precision work on bigger sheets.
- Paper or cardstock appropriate for your chosen size (letter, legal, or tabloid)
- Binding supplies: wire coils, plastic combs, or staples depending on your method
- Sturdy base material: chipboard, thick cardstock, or repurposed packaging for the easel back
- Cutting mat to protect your work surface
- Clear ruler or T-square for accurate measurements
- Adhesive: glue stick, double-sided tape, or spray mount for assembly
- Hole punch or binding punch if using coil or comb binding
- Optional: laminating sheets or pouches for weather-resistant pages
- Optional: corner rounder for professional-looking edges
- Optional: decorative elements like washi tape, stamps, or stickers for personalization
If you’re creating multiple calendars or plan to make this an annual tradition, investing in a desktop laminator runs about forty dollars and protects pages from coffee spills and daily wear. A corner rounder, while not essential, gives your calendar that store-bought finish and prevents dog-eared corners that catch on other desk items. For northern homes where you might track outdoor maintenance schedules, laminated pages let you use dry-erase markers for flexible monthly planning.
Important Safety and Preparation Considerations
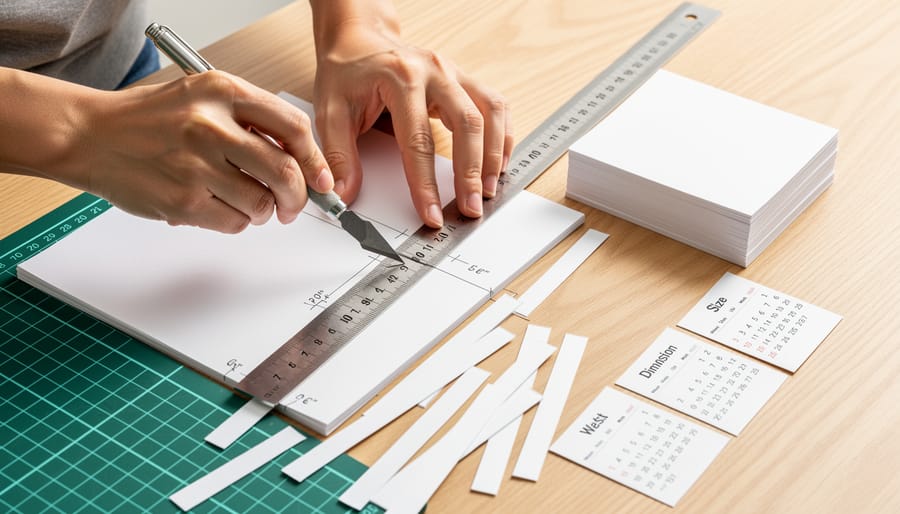
Before you start cutting and assembling your DIY desk calendar, take a few minutes to set up a safe workspace. Even straightforward projects involve tools that can cause injury if you’re rushing or working in cramped conditions.
Keep your cutting tools sharp, dull blades require more pressure and are more likely to slip. When using a craft knife or rotary cutter, always cut away from your body and keep your free hand behind the blade path. Store blades safely when not in use, especially if you have children or pets in your home.
Protect your work surface with a self-healing cutting mat or thick cardboard. This prevents damage to your desk and gives you a stable surface for accurate cuts. Clear the area of clutter so you have room to maneuver larger calendar sheets, particularly if you’re working with 11×17-inch formats or bigger. Position your laminator on a heat-resistant surface away from paper edges and other flammable materials.
Wire binding equipment has moving parts and punches that can pinch fingers. Read the manufacturer’s instructions before your first use, and never force materials through the machine. If you’re working in a basement or garage workshop during colder months, give laminating equipment extra time to reach operating temperature, northern climate spaces take longer to warm up.
How to Determine the Best Size for Your Needs
Measure Your Available Desk Space
Start by clearing everything off your desk to see the actual surface area you’re working with. Use a tape measure to record the width and depth of your workspace in inches. Then, place your monitor, keyboard, lamp, and other essential items back in their usual spots. Measure the remaining clear space in front of you where the calendar would sit.
A desk calendar needs roughly 2-3 inches of clearance on all sides to flip pages comfortably and avoid accidental spills from coffee cups. Test this by placing a book or piece of cardboard in the proposed spot, can you still access your keyboard easily? Does it block important items you reach for frequently? If you constantly shuffle things around during your workday, opt for a smaller calendar that stays put, or consider a vertical easel-style format that takes up less horizontal real estate.
Consider Your Planning Style and Detail Level
Your planning habits should drive your size choice. If you track basic appointments and deadlines only, a compact 5×7 or 6×8-inch calendar provides enough room without cluttering your desk. These smaller formats work well for single users with straightforward schedules.
Those who juggle detailed task lists, multiple family member schedules, or project timelines need more writing space. An 8.5×11-inch format accommodates several daily entries comfortably. Northern homeowners tracking seasonal responsibilities, like a fall cleaning checklist snow removal reminders, or year-round herbs maintenance, benefit from this extra space for month-to-month planning notes.
If you coordinate activities for three or more people, manage a home business, or maintain extensive gardening schedules through short growing seasons, consider an 11×17-inch calendar. The larger grid lets you color-code family members, add weather tracking, and note long-term projects without cramped handwriting. Match the space you need to write comfortably with the desk real estate you can spare.
Factor in Your DIY Skill Level and Tools
Your equipment and experience directly shape which calendar sizes you can execute successfully. Standard 8.5×11-inch calendars work with any home printer and require only scissors or a basic paper cutter, perfect for beginners. Larger formats like 11×17 inches need a wide-format printer or professional printing, plus a rotary cutter for clean edges. If you’re new to DIY projects, stick with letter-size: it prints at home, cuts easily on your kitchen table, and binds with simple hole-punch-and-rings methods. Compact sizes demand precision cutting and steady hands for clean results. Match your ambition to your tools rather than struggling with undersized equipment.
Think About Portability and Flexibility
If you’ll be carrying your calendar between locations, size becomes a critical factor. An 8.5×11-inch calendar slips easily into a standard bag or briefcase, while anything larger than 11×17 inches becomes genuinely awkward to transport without a dedicated portfolio case.
For northern homeowners who shift planning focus seasonally, tracking indoor renovation projects at your kitchen desk in winter, then moving the calendar to a mudroom or garage workbench for summer gardening and exterior maintenance, consider a mid-size format with a detachable base. This lets you relocate your calendar without sacrificing desk space in either location, and the consistent size means it fits the same spot year-round regardless of which room you’re working from.
Step-by-Step: Creating Your Desk Calendar at the Right Size
Design and Template Creation
Start with a blank document in your preferred software, Canva, Microsoft Word, or even Google Docs work well for DIY calendar templates. Set your page dimensions to match your chosen size exactly, then add 0.125-inch margins on all sides to prevent important dates or text from getting cut off during trimming.
If you’re planning to print at home, design your calendar pages slightly smaller than standard paper (7.5×10 inches on letter-size paper, for example) to avoid edge cropping. Include a bleed area, an extra 0.25 inches beyond your final trim line, if you’re using a print shop, ensuring background colors or images extend fully to the edges.
Create consistent spacing for date boxes, allowing roughly 1 inch per week row for comfortable writing. Northern climate homeowners should consider adding small seasonal reminder boxes at the bottom for tasks like furnace checks or snow tire changes.
Printing and Paper Selection
For compact calendars (5×7 to 6×8 inches), use 24-32 lb paper for adequate stiffness without overwhelming your printer. Standard 8.5×11-inch calendars work best with 28-32 lb cardstock, which most home inkjet and laser printers handle reliably. Large formats (11×17 and bigger) require 65-80 lb cardstock for proper rigidity, but this typically exceeds home printer capabilities.
If your printer maxes out at letter size, print standard pages at a local copy shop for 50 cents to $2 per sheet, a budget-friendly alternative to upgrading equipment. For northern homeowners tracking seasonal tasks year-round, consider matte-finish paper to reduce glare from winter sunlight through windows. Glossy paper looks sharp but shows fingerprints and reflects light.
Test a single month first to verify your printer feeds the paper weight smoothly before committing to a full year’s print run.
Cutting and Assembly
Once your pages are printed, cutting accuracy makes or breaks a professional-looking calendar. Use a metal ruler and sharp craft knife on a cutting mat for straight edges, rotary cutters work well for multiple sheets at once. Score fold lines lightly with a bone folder before creasing to prevent paper buckling.
For compact calendars (5×7 to 6×8 inches), a simple cardstock base with an angled fold creates a stable stand. Cut your base 2 inches wider than the calendar width, score a fold line 1.5 inches from the bottom edge, and attach pages with double-sided tape or corner slots.
Standard 8.5×11-inch formats work beautifully with wire binding. Punch holes along the top edge using a binding machine or manual punch (spacing matters, test first), then thread with twin-loop wire. No binding machine? Try binder clips attached to a weighted wood base.
Large calendars need substantial support. Attach an easel back made from sturdy chipboard, or mount pages to a cork board base. For northern climate durability, reinforce corners with clear tape before assembly to handle frequent page-turning during long planning seasons.
Adding Durability and Finishing Touches
After assembling your calendar, protect it from daily wear with a few simple treatments. Clear contact paper offers the most budget-friendly lamination alternative, cut it slightly larger than each page, smooth from center outward to avoid bubbles, then trim excess. For compact sizes, self-laminating pouches work perfectly and require no machine.
Reinforce corners with clear packing tape folded over edges, or upgrade to metal corner protectors from office supply stores for larger formats. These prevent dog-earing during frequent page turning, especially important for year-long calendars.
Consider eco-friendly clear acrylic spray as a protective coating. Apply two light coats in a well-ventilated space, letting each dry completely. This adds water resistance without plastic waste.
For decorative touches suited to northern homes, add fabric or leather binding strips along the top edge, incorporate pressed leaves between clear pages, or attach small wooden dowels as page separators. Muted colors, slate gray, forest green, cream, complement typical northern décor while keeping your planning space professional.
Testing Your Calendar and Making Adjustments

Before making multiple copies or considering your calendar complete, run a practical one-week test to ensure the size truly works for your daily routine. Place the calendar in its intended spot on your desk and use it as you normally would, noting appointments, tasks, and seasonal reminders throughout the week.
Check stability first. The calendar should sit firmly without tipping when you write on it or flip pages. If it wobbles, consider adding weight to the base or switching to a sturdier backing material. For larger formats, a weighted metal base works better than cardboard.
Evaluate readability from your typical seated position. Can you comfortably read dates and notes without leaning forward or squinting? If not, either increase the font size in your template or move up one calendar size for your next version.
Pay attention to whether the writing space accommodates your actual planning habits. Many northern homeowners find they need more room during winter months for indoor project lists and holiday planning. If you’re cramming information into margins or abbreviating excessively, you need a larger format. Conversely, if most days remain blank, you can downsize and reclaim valuable desk space.
Common Size-Related Problems and Solutions
Even after careful planning, you might encounter sizing challenges once you start building or using your desk calendar. The good news is that most size-related problems have simple, inexpensive fixes that don’t require starting from scratch.
If your calendar feels too large for your desk, try positioning it at an angle in the corner rather than centered. This reduces its visual footprint by about 30% and keeps more workspace clear. You can also switch to a flip-style format instead of a base-mounted design, which takes up less depth. For northern homeowners with seasonal desk setups, perhaps moving between a winter office and summer patio workspace, consider making two smaller versions instead of one oversized calendar.
Readability issues with small calendars usually stem from font choices rather than actual size constraints. Increase your text to at least 14-point for dates and 10-point for notes, even if it means less writing space. High-contrast printing (black ink on bright white paper) makes a compact calendar work surprisingly well. If eyestrain persists, mount a small LED desk lamp directly above the calendar.
What if my printer can’t handle my desired size?
Print your calendar in sections and join them with clear tape on the back, or use a print shop for larger formats, most charge $2-5 per page for 11×17 cardstock.
How do I make a large calendar stable?
Add a weighted base using a strip of quarter-inch plywood cut to match the calendar width, or attach small adhesive furniture pads to the bottom edges to prevent sliding.
Can I resize a calendar template without ruining the layout?
Most design programs let you scale proportionally, just ensure margins stay at least half an inch on all sides after resizing to prevent text cutoff during printing.
Stability problems plague top-heavy calendars, especially those larger than 11×14 inches. Reinforce the base by gluing a cardboard strip along the bottom edge, doubling its thickness. Alternatively, use binder clips at the back corners as makeshift feet, they’re removable and cost pennies. For wire-bound calendars that tip forward, bend the wire slightly backward to shift the center of gravity.
Printer jams with thick cardstock happen frequently in budget home printers. Run a test sheet through first, and if it struggles, print on regular paper and mount it to cardstock using spray adhesive or a glue stick. This two-layer approach works for any size and actually increases durability. When printing borderless designs, add a quarter-inch white margin in your template, most home printers can’t truly print edge-to-edge despite the setting.
Choosing the right desk calendar size ultimately comes down to finding that sweet spot between your available desk space, how much detail you need to track, and what you can realistically create with your tools and skills. If you’re still uncertain, start with the standard 8.5×11-inch format. It’s the most forgiving size for first-time DIY calendar makers, fits easily on most desks, and works with home printers and basic craft supplies.
You can always adjust the dimensions for next year’s calendar once you’ve lived with your first version and learned what works. For northern homeowners especially, having a well-proportioned desk calendar makes tracking seasonal tasks, long winter planning periods, and spring project prep far more manageable. The right size isn’t about perfection, it’s about creating a calendar that actually gets used every day.
