

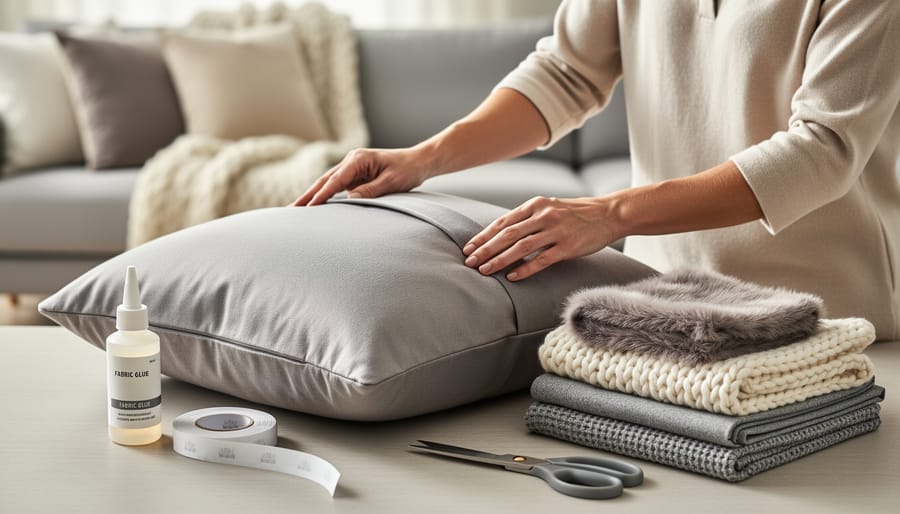
You can transform tired throw pillows into fresh statement pieces in under 30 minutes without touching a sewing machine, needle, or thread. No-sew pillow covers rely on fabric adhesives, iron-on hem tape, safety pins, or simple fabric manipulation techniques that deliver surprisingly durable results. These methods work perfectly for northern homeowners looking to refresh their living spaces affordably between seasons without investing in expensive sewing equipment or learning complex stitching techniques.
The appeal goes beyond convenience. No-sew covers let you experiment with seasonal fabrics, swap out heavy winter textures for lighter materials come spring, or test bold patterns before committing to permanent décor changes. For renters who can’t justify buying a sewing machine or homeowners who simply want quick results, these techniques offer the same custom look as traditional pillow covers. The fabrics you choose matter more in colder climates where indoor comfort runs from September through May, so selecting cozy flannels, faux furs, or chunky knits for winter months makes practical sense. Whether you’re working with standard 18-inch square pillows or oversized floor cushions, the core methods adapt easily to any size.
What You’ll Need to Get Started
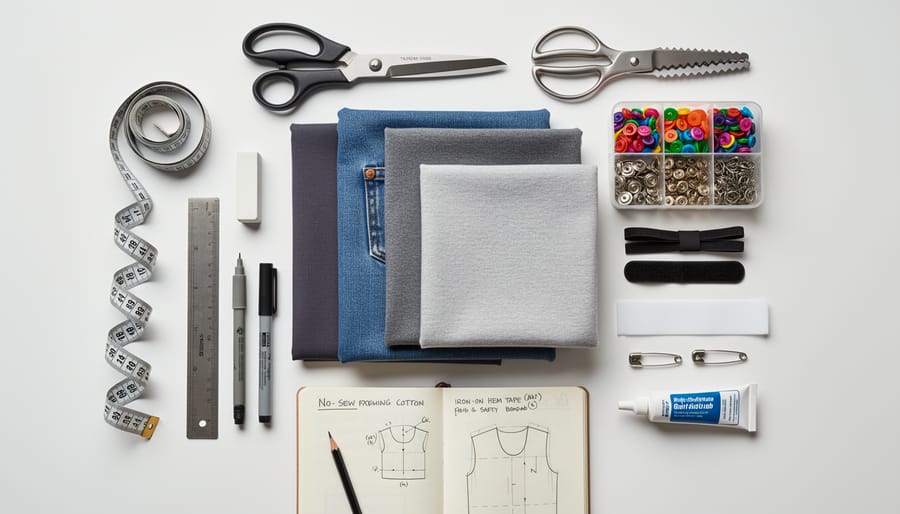
The beauty of no-sew pillow covers lies in their simplicity, you won’t need a sewing machine, special skills, or expensive equipment. Most of these materials are available at local craft stores or online, and many can be sourced from items you already have at home.
- Fabric: Choose fleece or felt for zero-fraying edges, or cotton and linen if you’re using fabric glue or hem tape (1 to 1.5 yards per standard pillow)
- Pillow inserts or existing pillows: Standard sizes are 18×18 inches or 20×20 inches, but any size works
- Measuring tape or ruler: Essential for accurate fabric cutting
- Sharp fabric scissors: Clean cuts prevent fraying and make assembly easier
- Fastening method: Fabric glue, iron-on hem tape, decorative safety pins, or hot glue gun with glue sticks
- Iron and ironing board: Needed if using iron-on hem tape or to press fabric before cutting
- Straight pins or clips: Helpful for holding fabric in place while adhesive sets
- Chalk or fabric marker: For marking cutting lines on darker fabrics
For northern climate homes, consider seasonal fabric choices that complement your changing décor needs. Heavier fleece, flannel, or wool-blend fabrics create cozy winter pillow covers that add warmth to your space during long Canadian winters. When spring arrives, switch to lighter cotton, linen, or chambray in fresh patterns.
Budget-conscious crafters can repurpose old sweaters, flannel shirts, or tablecloths instead of buying new fabric. Check thrift stores for oversized garments in appealing colors, a single large sweater can yield enough material for two pillow covers. Old curtain panels, vintage linens, and even worn jeans work beautifully and keep perfectly good fabric out of landfills.
The total cost typically runs between five and fifteen dollars per cover when using new materials, compared to twenty-five to fifty dollars for similar store-bought versions. Using repurposed fabrics can bring your cost down to nearly zero, making this an excellent project for refreshing multiple rooms without straining your budget.
Important Safety Tips and Precautions
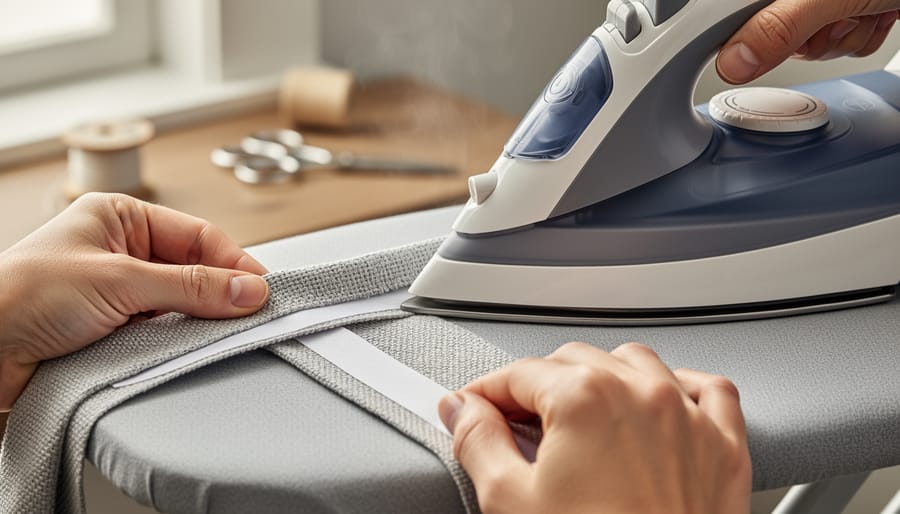
Before you start gluing, pinning, or pressing your way to beautiful pillow covers, take a few minutes to set up safely. These simple precautions will protect you, your family, and your fabrics.
When working with fabric glue or hot glue, always use these adhesives in a well-ventilated space. Open a window or turn on a fan to keep fumes from building up, especially if you’re working in a smaller room. The smell can be surprisingly strong, and prolonged exposure in a closed space can trigger headaches or nausea. Cover your work surface with old newspapers, a plastic tablecloth, or a silicone mat to catch drips and prevent damage to your table or counter.
Always unplug your iron or glue gun immediately when you step away, even for a moment. If you’re using an iron, check your fabric content first. Synthetic materials like polyester or nylon can melt under high heat, ruining both the fabric and your iron’s plate. Start with the lowest heat setting and test on a hidden corner or scrap piece before committing to the full project.
Test your chosen adhesive on fabric scraps before applying it to your actual pillow cover. Different fabrics react differently to glue and heat, and you’ll want to know if your method causes discoloration, stiffness, or weak bonding. This five-minute test can save you from wasting an entire piece of fabric.
Consider how you’ll clean your finished covers. Fabric glue and iron-on tape generally hold up to gentle hand-washing, but hot glue can soften or detach in warm water. Choose your fastening method with washing in mind, or plan to make removable covers you can spot-clean instead.
Step-by-Step: Creating Your No-Sew Pillow Cover

Step 1: Measure and Cut Your Fabric
Start by measuring your pillow insert’s width and height with a measuring tape. Write down both dimensions, accuracy here prevents a saggy or overly tight cover later.
For your fabric, add 2 to 3 inches to each measurement. A standard 18×18-inch pillow needs fabric cut to roughly 20×20 inches or 21×21 inches. This extra space accounts for the overlap at the back opening and gives you room to work with your fastening method. If you’re using thicker fabric or a plush pillow insert, lean toward the higher end of that range.
Before cutting, lay your fabric flat on a clean surface and smooth out any wrinkles. Mark your cutting lines lightly with tailor’s chalk or a washable fabric marker. For straight cuts without a rotary cutter, use a ruler or yardstick as a guide and press firmly while cutting with sharp fabric scissors. Kitchen shears work in a pinch but tend to slip.
Cut slowly and check your measurements twice. Uneven edges can throw off the entire project, making it harder to create clean folds and secure closures.
Step 2: Prepare Your Fabric Edges
Raw, cut fabric edges will unravel over time, especially with cotton, linen, or other woven materials. Preventing fraying now saves you from a messy pillow cover later.
If you chose fleece or felt in Step 1, you’re already done, these fabrics don’t fray, so you can skip ahead to Step 3. Their knit or compressed structure naturally resists unraveling at the edges.
For woven fabrics like cotton or linen, you have three options. Apply fray-check liquid directly to the cut edges using the applicator tip, working along each side and letting it dry completely (usually 15-20 minutes). This clear solution seals the fibers and prevents unraveling.
Alternatively, fold each raw edge under by half an inch and secure with iron-on hem tape. Place the tape between the folded fabric layers, press with a hot iron for 10-15 seconds following the tape’s package instructions, and let cool before moving the fabric.
For a quicker fix, fold edges under and secure with small dots of fabric glue every few inches, pressing firmly and letting dry.
Choose based on your fabric weight and how often you’ll handle the pillow.
Step 3: Create the Envelope Closure
Lay your fabric rectangle right-side down on a flat surface, with the longer dimension running horizontally. Place your pillow insert in the center as a guide. Fold one short end of the fabric over the pillow, covering about two-thirds of it. Then fold the opposite short end over, creating an overlap of 4-6 inches in the center back. This overlap is crucial, it holds the pillow inside without any fasteners.
The key is ensuring both folded edges meet past the center point. Too little overlap and your pillow will peek through; too much creates unnecessary bulk. Adjust the folds so the pillow fits snugly with the fabric wrapped around all sides. The right side of your fabric should now be visible on both the front and the overlapping back flaps.
For the quickest wrap-and-tuck method, simply center the pillow on the fabric, pull all edges toward the middle back, and tuck one flap inside the other. This works perfectly for square pillows and takes under a minute. You’ll secure these folds in the next step, but for now, just ensure everything lies flat and the overlap stays centered.
Step 4: Secure the Sides
Now it’s time to secure the sides of your pillow cover using your chosen no-sew method. The key to success here is patience and precision, rushing this step leads to weak bonds that won’t hold up.
For fabric glue: Apply a thin, continuous line of glue about ¼ inch from the fabric edge. Work on one side at a time, pressing the fabric layers together firmly for 30 seconds. Use clothespins or binder clips to hold edges in place while the glue sets. Most fabric glues need 24 hours to fully cure, so don’t insert your pillow yet. Keep your work flat on a protected surface during drying.
For iron-on hem tape: Cut strips to match each side length. Sandwich the tape between your fabric layers, then press with a hot iron (cotton setting) for 10-15 seconds per section. Don’t slide the iron, lift and press. Let each section cool for a minute before moving to the next edge. The bond strengthens as it cools.
For safety pins: Space decorative pins every 2-3 inches along each side, catching both fabric layers. Pin from the inside so closures face the back. This method works instantly and lets you swap covers easily, though it’s less secure for high-traffic use.
Step 5: Insert Pillow and Finish
Slide the pillow insert through the envelope opening at the back of your cover. Work slowly to avoid stressing the glued or taped edges. If the opening feels tight, gently wiggle the pillow form from corner to corner rather than forcing it straight through.
Once inserted, reach inside and push the pillow firmly into each corner. The fabric should stretch taut across the front while the overlapping back panels stay flat and secure. Flip the pillow over and smooth the envelope flaps so they lie flush against each other. Press along the glued or taped edges one more time to reinforce the bond.
Check all four corners by pinching them between your fingers. They should feel filled and square, not rounded or saggy. Adjust the pillow form by pushing from the inside if needed.
For decorative finishing touches, tie ribbons around the corners or center a fabric flower secured with hot glue. You can also attach large buttons with fabric glue for a tailored look. Let any added adhesive cure for the recommended time before using your finished pillow cover.
Testing Your Pillow Cover and What to Do Next
Once you’ve secured the final edge, give your new pillow cover a gentle test. Hold the pillow at the corners and shake it lightly, nothing should shift or slide loose. Run your fingers along each sealed edge to confirm the adhesive or tape has formed a continuous bond. If you spot any gaps or feel weak points, apply a small amount of additional glue or press the iron-on tape again for a few extra seconds while the area is still accessible.
A well-made no-sew cover should show no puckering at the seams, keep the pillow insert centered, and maintain clean, smooth corners when you fluff it. The envelope closure should stay snug against the back without opening during normal handling.
If fabric glue hasn’t bonded properly, let it cure for the full 24 hours recommended on the bottle, rushing this step causes most failures. For loose iron-on tape, reapply heat with a pressing cloth and hold for the manufacturer’s suggested time. Safety pin closures can simply be repositioned if they’ve loosened.
Care depends on your fastening method. Fabric glue and iron-on tape usually withstand gentle machine washing on cold, though hand washing extends their life. Remove safety pins before laundering. Fleece covers can go in the dryer on low; other fabrics should air dry to protect adhesive bonds.
Consider making multiple covers to swap seasonally, thick fleece or wool blends for Canadian winters, lighter cotton prints for spring and summer. This rotation keeps your space fresh without buying new pillows, and you can store off-season covers in a bin until the weather shifts. Once you’ve mastered the no-sew method, you might explore pillow covers with zippers for a more polished finish on high-use furniture.
Common Questions About No-Sew Pillow Covers
Will no-sew pillow covers hold up with regular use?
Yes, when made with quality materials and proper techniques, no-sew covers can last months or even years with normal household use. Fabric glue and iron-on tape create surprisingly strong bonds, though they work best on pillows that don’t get heavy daily wear.
Can I wash no-sew pillow covers?
Most no-sew covers can handle gentle hand washing or spot cleaning, but machine washing depends on your fastening method. Iron-on hem tape typically survives delicate cycles, while fabric glue may weaken with repeated washing and hot glue will likely fail completely.
What’s the best fabric for beginners?
Fleece is ideal for first-timers because it doesn’t fray, it’s forgiving to work with, and it needs minimal edge preparation. Felt runs a close second for the same reasons, plus both fabrics are perfect for cozy Canadian winters.
How much money can I actually save making my own covers?
You’ll typically spend between three and eight dollars per cover when using budget fabric, compared to fifteen to forty dollars for store-bought versions. The savings multiply fast when you’re refreshing multiple pillows for seasonal changes.
Do no-sew methods work for outdoor pillows?
These techniques aren’t recommended for outdoor use in Canadian climates where moisture, temperature swings, and UV exposure will break down adhesives quickly. If you want no-sew outdoor covers, stick to indoor-outdoor spaces like covered porches and bring them in during harsh weather.
What if my fabric glue didn’t bond properly?
Let the adhesive cure for the full recommended time (usually 24-72 hours) before handling, and if edges still lift, apply a thin additional layer and clamp or weight them down while drying. Switching to iron-on tape often works better for stubborn fabrics.
The beauty of no-sew pillow covers is how quickly you can swap them out to match changing seasons or catch up with holiday decor trends without committing to permanent purchases. Make several covers in different patterns and rotate them every few months to keep your space feeling fresh. You can even coordinate with warm holiday kitchen ideas by choosing complementary colors and textures for a cohesive look throughout your home. The confidence you build with this simple project opens doors to more ambitious DIY decorating without the intimidation factor of learning to sew.
You’ve just created custom pillow covers without touching a sewing machine, and for a fraction of what store-bought versions cost. That’s the beauty of no-sew methods: they’re genuinely accessible to everyone, regardless of skill level or budget. Whether you used fabric glue, iron-on tape, or safety pins, you now have a practical technique for refreshing your living space whenever the mood strikes.
Start with one or two pillows to build your confidence, then expand to seasonal rotations. Switch to cozy fleece for winter, light cotton for summer, or festive patterns that coordinate with your holiday table refresh. The more covers you make, the easier the process becomes, and the more you’ll enjoy transforming your home’s look without specialized equipment or expensive investments.
