

# Tree Planting Guidelines for Northern Climate Success
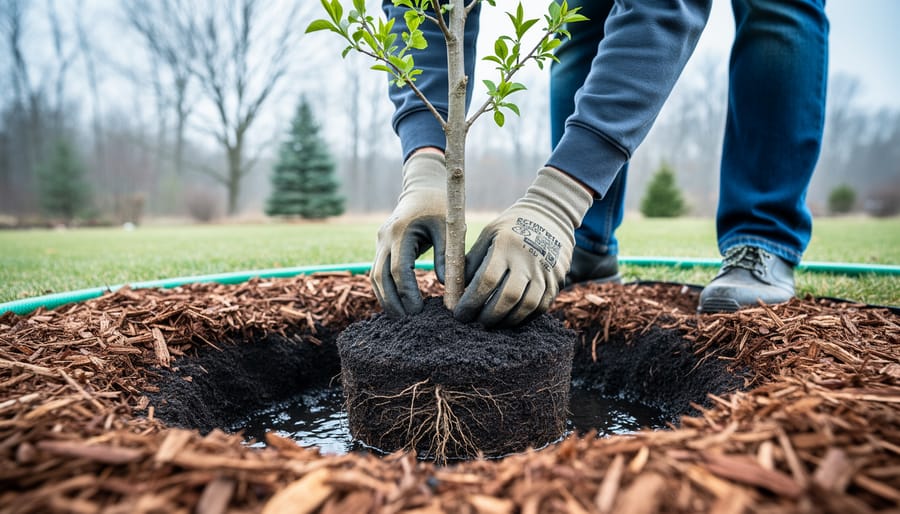
Plant your tree during dormant seasons—late fall after leaf drop or early spring before bud break—when roots can establish without supporting active foliage growth. Dig a hole twice as wide as the root ball but no deeper than the root flare, that visible point where trunk meets roots, which must sit at or slightly above ground level to prevent rot in our freeze-thaw cycles.
Remove all burlap, wire baskets, and containers completely before backfilling with native soil, as amended soils create moisture barriers that suffocate roots during northern winters. Water deeply immediately after planting with 10-15 gallons, then maintain consistent moisture through the first growing season without creating standing water that freezes and damages developing roots.
Skip fertilizer for the first year—newly planted trees need root establishment, not top growth that northern frosts will damage. Apply 2-4 inches of wood chip mulch in a donut shape, keeping material 6 inches away from the trunk to prevent bark decay while insulating roots against temperature extremes.
These proven guidelines work whether you’re planting your first sapling or replacing a tree that didn’t survive. Follow these steps exactly, and you’ll give your tree the foundation it needs to thrive for decades in challenging northern conditions.
Choosing the Right Time to Plant Your Tree
Timing can make the difference between a thriving tree and one that struggles to survive, especially in our northern climate where growing seasons are notoriously short. Understanding the optimal planting seasons helps you give your tree the best possible start.
In northern climates, you have two ideal windows for planting: early spring and fall. Spring planting should happen as soon as the ground thaws and becomes workable, typically late April through early June depending on your region. This timing allows roots to establish before summer heat stress sets in. Fall planting works beautifully from late August through October, giving trees time to develop roots while the soil remains warm, even as air temperatures drop.
This temperature window is critical because roots continue growing even after the leaves have fallen, taking advantage of warm soil to anchor themselves firmly before winter dormancy.
Avoid planting during our brief but intense summer months, typically July and early August. The combination of heat stress, increased water demands, and our sometimes unpredictable rainfall creates difficult conditions for new transplants. Similarly, resist the temptation to plant too late in fall when soil temperatures drop below 40°F, as roots simply won’t establish properly.
Monitor your local frost dates carefully. Your last spring frost should have passed before planting, and you want to plant at least six weeks before the first expected fall frost. Soil that feels crumbly rather than muddy indicates proper moisture levels for planting. If it clumps wetly in your hand, wait a few days for better drainage conditions to prevent root damage during the crucial establishment period.
Selecting the Perfect Planting Location
Choosing the right spot for your tree is like finding the perfect home – location truly matters! Let’s walk through the key factors that will help your tree thrive through our challenging northern winters.
Start by observing sun patterns in your yard throughout the day. Most trees need at least six hours of sunlight daily, but this varies by species. Spend a weekend noting which areas get morning versus afternoon sun. Remember, our shorter northern growing seasons mean maximizing sunlight is essential for healthy growth.
Next, consider wind exposure. Northern winds can be brutal, causing winter burn and physical damage to young trees. Look for naturally sheltered spots near fences or existing vegetation, but avoid planting too close to windbreaks as trees need some air circulation to develop strong trunks. If your yard is exposed, consider planting hardy, wind-resistant species or creating windbreaks with shrubs first.
Drainage is critical, especially during spring thaw when melting snow can create standing water. Never plant in low spots where water pools – this leads to root rot and winter heaving when soil repeatedly freezes and thaws. Test drainage by digging a hole one foot deep, filling it with water, and checking if it drains within 24 hours. Poor drainage? Consider raised planting beds or choosing water-tolerant species.
Pay careful attention to proximity to structures. A common mistake is planting too close to houses, driveways, or power lines. Account for the tree’s mature size, including both canopy spread and root system. For northern climates, add an extra consideration: heavy snow loads falling from roofs can crush young trees, and accumulated snow piles from shoveling can smother them. Plant at least 15 feet from buildings and avoid areas where snow gets piled during clearing.
Finally, call before you dig! Contact your local utility company to mark underground lines – hitting them is dangerous and expensive.
Preparing the Planting Hole Correctly
Getting the Dimensions Right
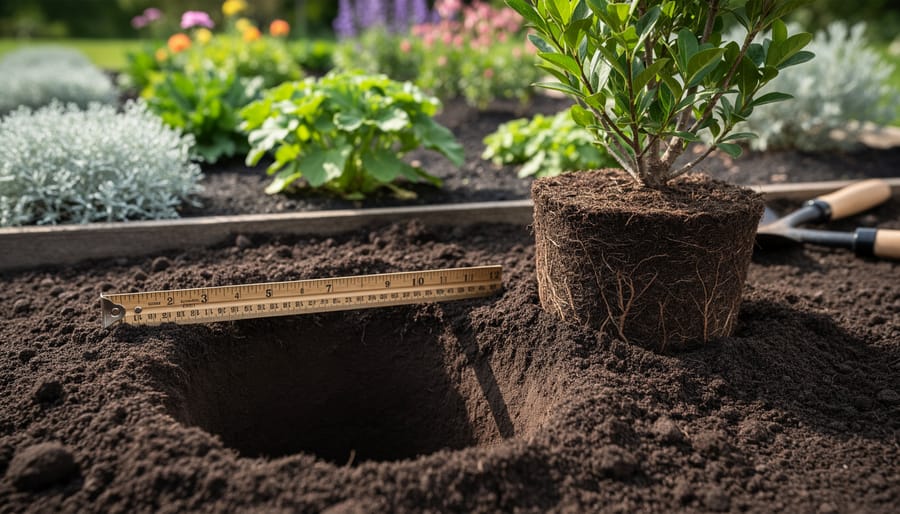
Getting your hole dimensions right makes the difference between a thriving tree and one that struggles to establish roots in northern soils. The ideal planting hole width should be two to three times wider than your root ball, but no deeper than the root ball’s height. Think of creating a shallow bowl rather than a deep bucket.
Here’s an easy way to visualize it: if your root ball measures 12 inches across, dig a hole that’s 24 to 36 inches wide. For depth, the top of the root ball should sit level with or slightly above the surrounding ground. This prevents settling, which is especially important in our northern clay soils that hold moisture.
A common mistake is digging too deep and backfilling underneath the root ball. This creates a sinking effect as the soil settles, drowning your tree’s roots over time. Instead, dig your hole like a dinner plate, not a coffee mug. The wider hole gives roots room to spread into loosened soil while the shallow depth prevents water from pooling around the trunk during spring thaws and heavy rains.
Working With Northern Soils
Northern soils present unique challenges that can make or break your tree planting success. The good news? Most northern trees have actually evolved to thrive in these exact conditions, so you often need less intervention than you might think.
Clay-heavy soil dominates much of Canada’s landscape, and while it can feel like working with concrete when dry, it’s naturally rich in nutrients. The key is knowing when to leave it alone. If your soil is workable when moist and your chosen tree is native to your region, skip the amendments. Adding sand or excessive organic matter to clay actually worsens drainage and creates a “bathtub effect” where water pools around roots.
However, understanding your specific soil type helps you make informed decisions:
| Soil Characteristics | Drainage Properties | Recommended Amendments |
|---|---|---|
| Forms tight ball when squeezed, sticky when wet | Poor drainage, holds water | None for native trees; add 2-3 inches compost only if necessary |
| Gritty texture, falls apart easily | Excellent drainage, dries quickly | Mix in 3-4 inches compost to retain moisture |
| Smooth feel, holds shape but crumbles | Good drainage and retention | None needed |
Rocky soil requires a different approach. Remove only stones larger than your fist from the planting hole, leaving smaller rocks in place. They actually improve drainage and prevent soil compaction over time.
Test drainage by filling your planting hole with water. If it drains within 12 hours, you’re good to go. Standing water beyond 24 hours signals serious drainage issues that require either choosing a moisture-loving species or creating a raised planting mound 8-12 inches high using existing soil.
Planting Your Tree Step-by-Step
Now comes the exciting part—getting your tree into the ground! Following proper tree planting guidelines during this step makes all the difference between a thriving tree and one that struggles. Let’s walk through the process together.
Start by digging your hole. It should be 2-3 times wider than the root ball but no deeper than the root ball’s height. This is crucial in northern climates where deep planting can cause roots to suffocate in cold, waterlogged soil. A wider hole encourages lateral root growth, helping your tree establish itself quickly.
Before removing your tree from its container, water it thoroughly. This keeps the root ball intact and reduces transplant shock. For container-grown trees, gently tip the pot on its side and slide the tree out. If roots are circling the container (a common issue), use your hands or a knife to score the root ball vertically in 3-4 places and gently tease out some roots. This prevents girdling roots that can eventually strangle your tree.
For burlap-wrapped trees, place the root ball in the hole first, then cut away as much burlap and wire as possible. In our northern climate, synthetic burlap won’t decompose, so remove it entirely if you can identify it.
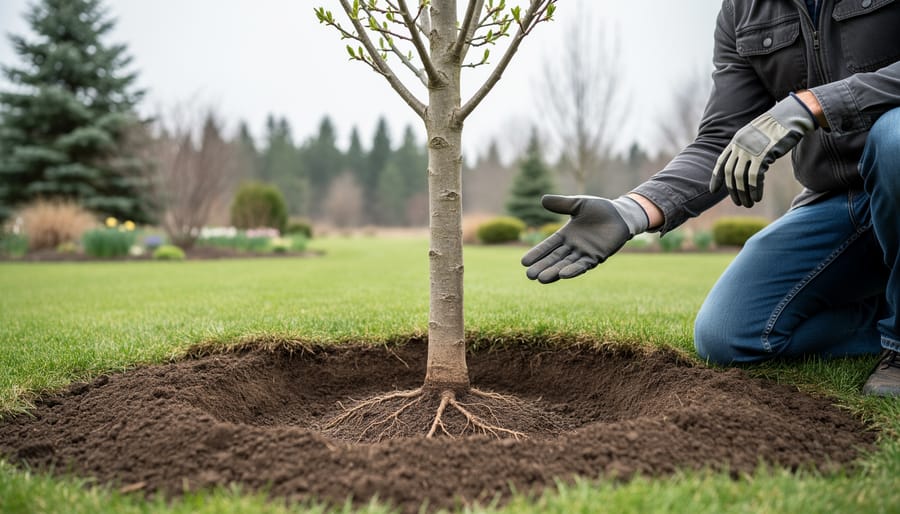
Position your tree carefully in the hole. The root flare—where the trunk widens at the base—should be slightly above ground level, about 2-5 cm higher. This accounts for settling and prevents the trunk from sitting in water during spring thaw, which can cause rot. Use a shovel handle across the hole to check the height.
Once positioned correctly, backfill with the original soil you removed. Resist the temptation to add amendments like compost or peat moss to the backfill. Research shows trees establish better when they adapt to native soil immediately rather than living in a “luxury penthouse” surrounded by hard clay. Break up large clods and remove rocks, but use what came out of the hole.
Fill the hole in stages, gently tamping the soil with your foot to eliminate air pockets without compacting it heavily. When the hole is two-thirds full, water deeply to settle the soil, then finish backfilling.
Create a water ring—a 5-10 cm raised berm of soil—around the planting hole’s outer edge. This basin directs water to developing roots rather than letting it run off. In northern gardens where summer drought can stress new trees despite our reputation for moisture, this simple feature ensures efficient watering throughout that critical first season.
Watering Guidelines for Newly Planted Trees
Proper watering is absolutely critical to your newly planted tree’s survival, especially during that make-or-break first year. Northern climate trees face unique challenges—our cold winters mean a shorter growing season, so your tree needs every advantage to establish strong roots before the freeze sets in.
For the first two weeks after planting, water deeply every 2-3 days if there’s no significant rainfall. Think “deep and infrequent” rather than “shallow and daily.” You want water to penetrate 12-15 inches down into the soil, encouraging roots to grow downward rather than staying near the surface. A slow trickle from your garden hose placed at the base for 20-30 minutes works perfectly, or use a soaker hose formed in a circle around the trunk.
After those initial two weeks, adjust to once-weekly deep watering sessions throughout the growing season. Your newly planted tree needs about 10-15 gallons per watering for every inch of trunk diameter. A 2-inch diameter trunk would need 20-30 gallons weekly. In northern regions, factor in our rainfall—if you’ve received a good soaking rain (over 1 inch), you can skip that week’s watering.
To check moisture levels, stick your finger or a long screwdriver into the soil near the root ball. If it comes out damp, hold off on watering. The soil should feel moist but not soggy.
Continue this deep watering schedule through your first fall until the ground freezes. Even after leaves drop, roots keep growing in temperatures above 40°F. One final deep watering before winter freeze-up helps prevent desiccation damage during our harsh northern winters, setting your tree up for success come spring.
Mulching and Protecting Your Investment
Proper mulching is one of the simplest yet most effective ways to protect your newly planted tree and give it the best start possible. Think of mulch as a cozy blanket that keeps your tree’s roots comfortable year-round while conserving precious moisture.
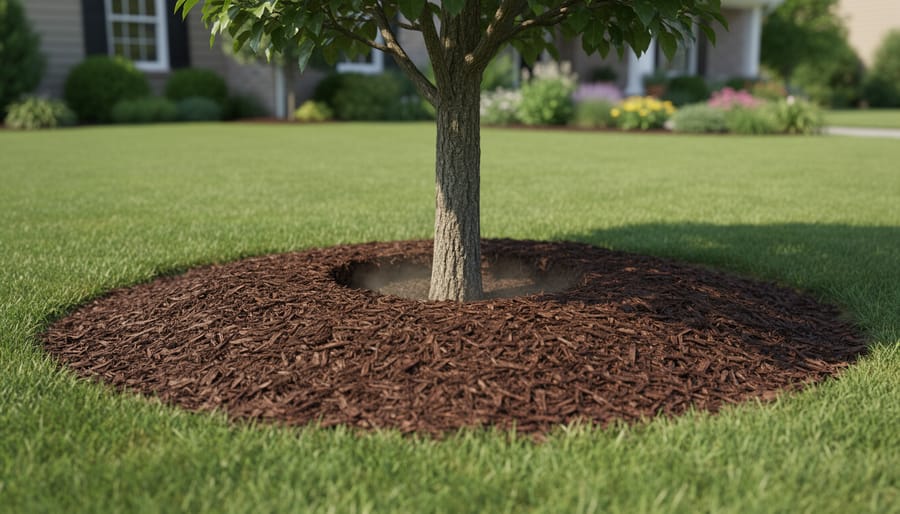
Start by spreading a 2-4 inch layer of organic mulch around your tree’s base, extending out to the drip line if possible. Shredded bark, wood chips, or composted leaves all work beautifully and won’t break your budget. Here’s the golden rule: never pile mulch against the trunk itself. Create a donut shape with a 3-6 inch gap around the trunk to prevent rot and discourage rodents from nesting. We call this the “mulch volcano mistake” and it’s surprisingly common, so resist the urge to mound it high.
In northern climates, winter protection becomes essential for successful tree planting guidelines. Young trees face harsh conditions including extreme temperature swings, drying winds, and hungry deer or rabbits looking for a winter meal.
For the first two winters, wrap the lower trunk with commercial tree wrap or light-colored plastic guards. Start at the base and spiral upward, overlapping by about half the width. This prevents sunscald, where winter sun heats the bark during the day and freezing temperatures crack it at night. Remove wrapping each spring to avoid trapping moisture.
Consider installing a simple windbreak using burlap stapled to stakes on the windward side of your tree. This DIY solution costs just a few dollars but dramatically reduces winter desiccation. If deer or rabbits are concerns in your area, encircle the tree with chicken wire fencing extending 3-4 feet high. These budget-friendly protection strategies ensure your investment thrives through its vulnerable first years.
First-Year Care That Ensures Long-Term Success
The first year after planting determines whether your tree thrives for decades or struggles from the start. Think of yourself as a tree’s personal support system during this critical period—your attention now pays off for years to come.
Most newly planted trees don’t need staking unless they’re in exposed, windy locations or have unusually small root balls. If you do stake, use soft, wide straps that won’t cut into the bark, and position stakes outside the root zone. Keep stakes low enough that the top third of the trunk can move freely—this movement actually strengthens the tree. Remove all stakes after one growing season, as leaving them longer causes more harm than good.
Resist the urge to prune heavily during the first year. Remove only dead, damaged, or crossing branches. Your tree needs every healthy leaf possible to photosynthesize and establish strong roots. Save structural pruning for year two or three.
Water remains your primary focus throughout the first growing season. Check soil moisture weekly by sticking your finger two inches down—if it’s dry, water deeply. In northern climates, continue watering until the ground freezes in fall, as trees need moisture reserves heading into winter.
Watch for stress signals like wilting, yellowing leaves (outside of normal fall color), or premature leaf drop. These often indicate watering issues rather than disease. Brown leaf edges usually mean too little water, while constantly soggy soil and yellowing leaves together suggest overwatering.
Keep the mulch ring maintained but never piled against the trunk—this “mulch volcano” mistake invites rot and pest problems that plague northern gardens.
Following proper tree planting guidelines makes all the difference between a thriving tree and one that struggles to survive, especially in our challenging northern climate. By taking your time with each step—from selecting the right location and preparing the soil to watering correctly and providing first-year care—you’re setting up your tree for decades of healthy growth. Think of it as an investment: a few extra hours spent planting correctly now will save you from replacement costs and the disappointment of watching a tree decline.
Northern conditions demand extra attention to detail, but the rewards are worth it. Your properly planted trees will develop strong root systems that can withstand harsh winters, provide crucial habitat for local wildlife, sequester carbon, and improve air quality in your neighborhood. They’ll also increase your property value while creating shade that reduces summer cooling costs. Remember, even experienced gardeners started as beginners, so don’t let uncertainty hold you back. With these tree planting guidelines in hand, you have everything you need to successfully add beautiful, resilient trees to your landscape that will benefit both your family and the environment for generations to come.
