

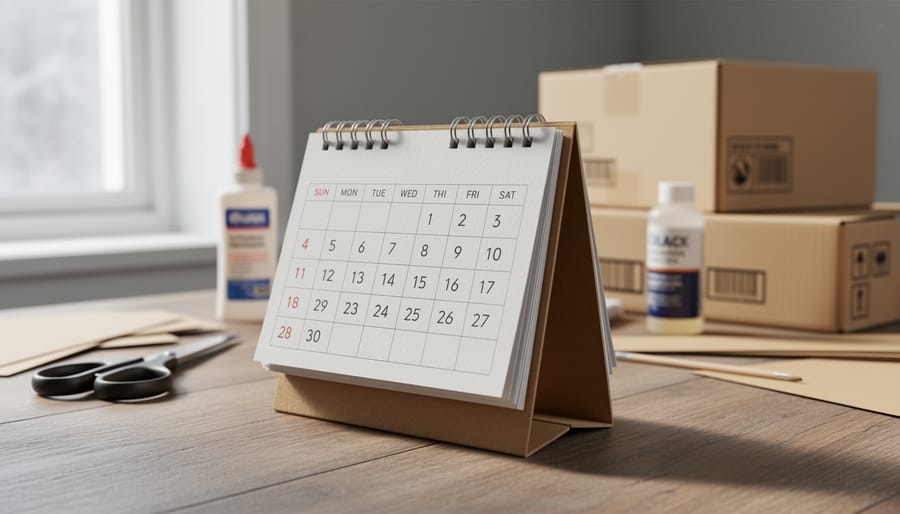
A 3D desk calendar is a freestanding calendar with layered or folded parts that give the dates real depth, and you can build one at home in a single afternoon for just a few dollars. The basic method is simple: cut stiff cardboard or cardstock into stepped tiers or a tent-style stand, label the months and dates, then fold and glue it into a shape that holds itself up on your desk. No special skills, no power tools, and most of what you need is probably already in your recycling bin.
The timing is right, too. When the first hard frost arrives and you’re spending more hours at the home office, a desk that feels a bit more personal makes the long, dark winter workdays easier to face. And that stack of shipping cartons from the holiday season? It’s your free raw material.
Below, you’ll pick a style, gather budget-friendly and eco-friendly supplies, and work through each step with a few safety tips along the way. Expect two to three hours and beginner-level effort.
Which Style of 3D Desk Calendar Should You Build?
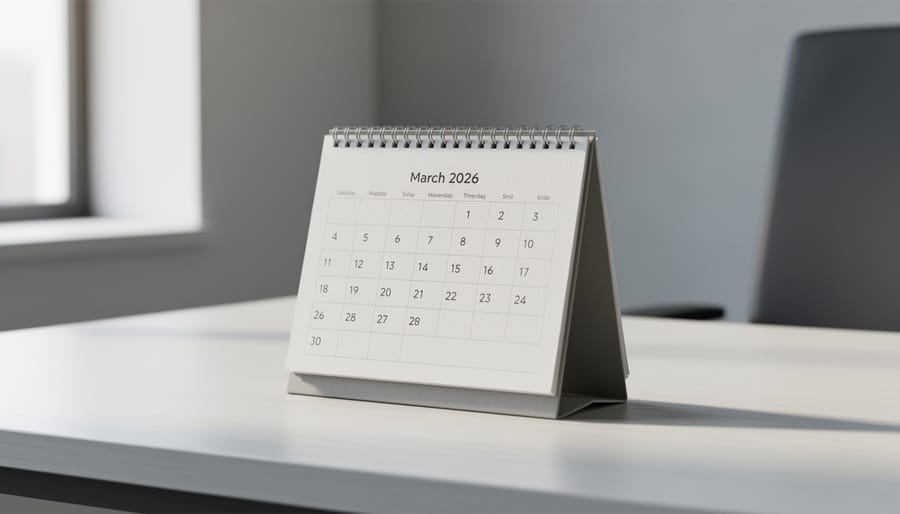
Before you shop for supplies, pick a design. All three of these 3D desk calendar styles are beginner-friendly, and each one suits a different spot in your home.
Folded tent calendar. One long strip of cardstock folds into a triangle, so the calendar leans back like a little tent. It’s the simplest build and uses the least material. A tent takes up almost no room, which makes it ideal for a small apartment desk or a narrow windowsill.
Flip-card stand. Here you make a sturdy base with a ledge or slot, then turn twelve separate month cards that sit upright and flip forward. It’s a bit more work, but you can decorate each month on its own card. This one looks great on a kitchen counter, where you want to glance at the month while the kettle boils.
Stacked-block perpetual calendar. Two or three small blocks sit side by side, and you turn them to show the day and month. “Perpetual” just means the dates work for any year, so you build it once and never redo it. The blocks take more cutting and gluing, and they need a little more space, so they suit a home office desk where you’ll use the calendar every day.
Not sure which to pick? Start with the tent. It’s quick, forgiving, and cheap, and you can always build a fancier one next weekend. Whichever you choose, it pays to choose the right size for your desk before you cut anything, so the finished calendar fits your space and doesn’t crowd your keyboard.
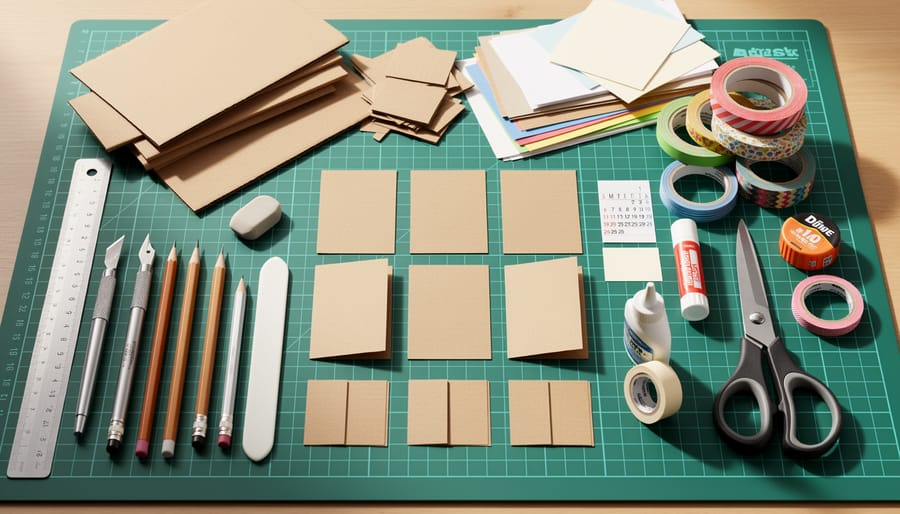
Tools and Materials for Your DIY Desk Calendar (Budget-Friendly Swaps Included)
Eco-Friendly and Recycled Material Ideas
Winter online orders leave most Canadian homes with a stack of shipping boxes, and that corrugated cardboard is your best free material. Cut the flat panels from delivery cartons for the base and support strip. Thick recycled cardboard holds its shape far better than thin paper, so your calendar won’t sag or tip over after a few weeks on the desk.
A few other reuse ideas worth a look:
– Old greeting cards: the heavy, glossy fronts make sturdy month pages or a decorative cover panel.
– Cereal and cracker boxes: thinner than shipping cartons, but perfect for the folding tent portion.
– Kraft paper and paper bags: flatten them for a rustic wrap that needs no paint.
– Newspaper: use it to protect your table, or layer it with glue for a papier-mâché finish.
For glue, reach for a water-based white school glue or a glue stick labelled non-toxic. Both clean up with water, have little odour, and are kinder to a closed-up winter home. Skip solvent-heavy craft cements when you can.
Safety Warnings Before You Start Cutting and Gluing
Craft projects feel harmless, but a sharp blade and a hot glue gun can both send you to the first-aid kit if you rush. A few habits keep this afternoon fun.
Always cut away from your body, and put a self-healing cutting mat under your work so the blade doesn’t skid across your desk or kitchen table. Use a metal ruler as your guide, since a plastic one gets nicked and can send the knife wandering. Swap in a fresh blade when cutting starts to feel like tearing. A dull blade needs more pressure, and extra pressure is how slips happen.
Here’s a “stop and rethink” moment: if the cardboard is too thick to cut in one pass, don’t force it. Make several light passes along the same line instead, letting the blade deepen the groove a little each time. It’s slower, but it gives a cleaner edge and far fewer accidents.
Spray adhesive and hot glue both call for fresh air. In winter, when the house is buttoned up tight, it’s tempting to work in a sealed room. Crack a window instead, even just an inch, and let the air move. For hot glue, keep a bowl of cool water nearby for burns, and set the gun on a scrap of cardboard, not directly on your desk.
Finally, store craft knives out of reach of kids, and let little helpers handle safe jobs like decorating pages.
How to Build a 3D Desk Calendar, Step by Step
Measure, Cut, and Score the Base and Backing
Start with the finished size, since everything else follows from it. A good tent-style base is about 7 inches wide and 5 inches tall, which tucks onto a narrow desk or windowsill without crowding your keyboard. If your space is tighter or roomier, check desk calendar sizing before you mark anything.
Before touching your good cardboard, cut a rough version from scrap paper. Fold it, stand it up, and see if it sits right. This five-minute template saves you from wasting a clean cereal box panel on a miscalculation.
Once the paper version looks right, transfer it to your real material:
- Measure the base and the backing piece with a metal ruler, and mark the corners lightly in pencil.
- Connect the marks with straight pencil lines so you can see the full outline before cutting.
- Place the cardboard on a cutting mat and cut along the lines with a sharp craft knife, using the metal ruler as a guide.
- Mark each fold line, usually about one inch from the bottom edge of the backing.
- Score each fold line by pressing the dull back of a butter knife or a spent ballpoint pen along the ruler.
Scoring just means pressing a shallow groove so the cardboard bends exactly where you want it. Press firmly but don’t cut through. When you fold along the groove, the edge should snap crisp instead of crumpling, which makes the 3D stand look polished once it’s glued.
Assemble the 3D Frame and Reinforce It
With your pieces cut and scored, it’s time to turn flat cardboard into a real 3D desk calendar. Start with a dry fit: fold along every scored line without any glue and check that the stand closes into a clean triangle (or a stepped shape, if you chose that style). If a fold springs open or the edges don’t meet, trim a millimetre or two now rather than fighting it later.
Once it folds neatly, run a thin line of glue along the overlap tab, press it to the inside face, and hold it for a full minute. Binder clips or clothespins work well as free clamps. Go easy on the glue. Soaked cardboard goes soft, and a thin bead holds better than a thick puddle.
Now for the part that stops wobbling. Cut a support strip from thick cardboard, about 2.5 cm (1 inch) wide and as long as the inside width of your base. Glue it across the bottom fold of the triangle, or between the front and back panels, so it acts like a brace. This one strip is what keeps your calendar from tipping every time you flip a page.
Let everything cure for at least 30 minutes before handling, and ideally a few hours before you add pages. Dry winter air helps glue set fast, which is a nice perk of the season. Just keep the piece away from radiators, baseboard heaters and heat vents. Direct heat dries one side faster than the other, and that’s how cardboard warps. A shelf across the room does the job nicely.
Make and Attach the Monthly Pages
Start with twelve pages cut slightly smaller than the front panel of your stand, so they flip without catching. If your tent frame is about 15 cm wide, aim for pages around 14 cm. Cut them all from one template so they stack neatly.
For the date grid, you have two easy routes. Draw it by hand: use a ruler to mark seven columns and five or six rows, then label the top row with the weekdays. Or print a free monthly template at home or at your public library, where printing usually costs only a few cents a page. Tip: check each month’s first weekday against a current calendar before you ink anything. Pencil first, pen second.
Now pick how the pages turn.
– Punch-and-ring: Use a hole punch along the top edge of each page, then thread them onto a small binder ring or a loop of string. Flip each page over the top as the month ends. This is the cheapest and most forgiving option.
– Slot-and-flip: Cut two small slits near the top of the back panel and slide a paper tab from each page through them. Pages lift out and swap easily, which is handy if you want to refresh them next year.
If you’ve never done either, start with the ring. Mistakes are easy to fix.
Now the fun part. Give winter months snowy scenes, with a simple pine tree sketch, paper snowflakes cut from scrap, or white pencil dots on dark paper. Add washi tape along the page edges, or use a rubber stamp from the dollar store for little accents on special dates. Leftover wrapping paper and old magazine pages also make great colourful borders without spending a cent.
Add Finishing Touches and Decoration Ideas
Once the frame is dry and sturdy, it’s time to make it look like yours. Start with the surface. Acrylic craft paint works well on cardboard, and a thin first coat keeps the board from soaking up moisture and bowing. If you’d rather skip paint, cover the frame with kraft paper, scrap wrapping paper, or fabric offcuts glued down with a water-based adhesive.
Next, protect your work. A light coat of non-toxic, water-based sealer will shield the paper from desk-top scuffs, coffee rings, and the dry winter air that makes edges curl. Clear contact paper is the budget-friendly alternative, and it’s easier for beginners because there’s no brushing or drying time. Smooth it from the centre outward to push out air bubbles.
Then pick a look that suits your space:
– Scandinavian-inspired minimalism: matte white or soft grey paint, thin black lettering, and a single sprig of dried greenery.
– Rustic cabin: leave the cardboard’s natural brown, add twine around the base, and stamp the numbers in dark ink.
– Bright kids’ craft: bold colours, stickers, and glitter glue (let them go wild).
For an interior design touch, pull one or two colours from your desk, shelf, or nearby art so the calendar looks like it belongs there. If you like changing things up for the season, browse the latest holiday decor trends for palette ideas you can swap in with fresh page covers.
Check Your Work and Keep Your Calendar Looking Good
Once the glue is dry, give your calendar a quick test before it takes its place on the desk. Set it on a flat surface and nudge it gently from the side. It should stand steady without rocking. Then flip through all twelve pages to make sure they turn freely and nothing catches on the rings or slots.
Next, check the dates. Count the days in each month against a trusted calendar, and pay special attention to February. In a leap year it needs 29 days, so confirm the year first, then count the squares. If you made it perpetual, add a small note to remember the leap-year rule.
Most problems are easy to fix:
– Wobbly base: Glue a second cardboard strip inside the frame and press it flat under a heavy book while it cures.
– Curling pages: Dry winter air can make paper curl. Press the pages under books overnight, or use slightly heavier cardstock next time.
– Glue showing: Cover smudges with washi tape, a stamp, or a thin strip of kraft paper.
Once you’re happy with it, try a mini version as a gift, or build a perpetual block calendar that never needs new pages. Making one is also a nice little project for a winter home refresh.
Common Questions About Making a 3D Desk Calendar

Short answers to the things people ask most before they start.
How long does it take to make a 3D desk calendar?
Plan on two to three hours for a first build, including glue drying time. Cutting and scoring go quickly once you’ve done them once, so a second calendar is often done in about an hour.
Can kids help?
Absolutely. Let them decorate the pages, add stickers, and fold the pre-scored pieces, while an adult handles the craft knife and hot glue.
What if I don’t have a craft knife?
Sharp, sturdy scissors work fine for cardstock and thin cereal-box cardboard. For thicker cardboard, make several light passes with scissors instead of forcing one big cut, or ask a friend to borrow a utility knife.
Can I make one without a printer?
Yes. Use a ruler to draw each month’s grid by hand, or trace one grid onto scrap paper and copy it twelve times. Handwritten numbers give the calendar a charming, personal look.
How do I keep it from fading near a sunny window?
Winter sun bouncing off snow is surprisingly strong, so keep the calendar a little back from the glass. A layer of clear contact paper over the pages also helps protect colours and ink.
Does humidity affect paper pages in winter versus summer?
It can. Dry winter air makes paper stiff and slightly brittle, while damp summer weather can make pages curl. Heavier cardstock holds its shape better in either season, and keeping the calendar away from radiators or humid spots like a kitchen sink helps too.
If your question isn’t on the list, the good news is that this project is forgiving. Scrap materials and a bit of patience will get you most of the way there.
A handmade 3D desk calendar is one of the friendliest projects you can pick up. It costs next to nothing, it forgives mistakes, and you don’t need a single fancy tool to get a result you’ll be proud of. A crooked score line or a bit of glue peeking out won’t ruin anything. You can trim it, cover it with washi tape, or just call it character and carry on.
So start with what’s already in your recycling bin. A cereal box, a shipping carton from your last online order, and a handful of leftover cardstock are plenty. Build the simple tent style first, then try a perpetual block version once you’ve got the hang of it. Make it yours with colours that suit your desk, a snowy scene for the winter months, or a few doodles in the margins.
The best time to begin is right now. Pick a cold, grey afternoon, put the kettle on, crack a window if you’re gluing, and spread your supplies across the table. By dinnertime, you’ll have a calendar that’s useful, personal, and entirely your own.
